How to draw a bird of freedom How to draw a bird in stages with a pencil Drawing a bird is a task that often confronts children and their parents. Sparrows, crows, jackdaws,
How to draw a freedom bird
Drawing a bird is a task that often confronts children and their parents. Sparrows, crows, jackdaws, nightingales, bullfinches, eagles, tits and other birds are common objects in children's albums. There is also a place for unusual characters – firebirds and Angry Birds. However, everything is not as difficult as it sometimes seems for novice artists. Using visual lessons and acting step by step, step by step, you can make a high-quality and clear drawing. After several trainings in drawing a bird, the child will get better and better.
Bird Drawing Tutorials Step by Step
Bird drawing lessons with step by step photos for beginners will help artists master the art of drawing birds on paper.
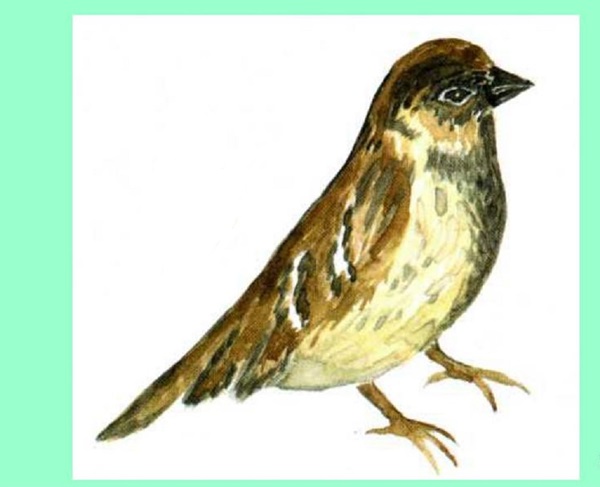
Wintering Bird: Draw a Sparrow
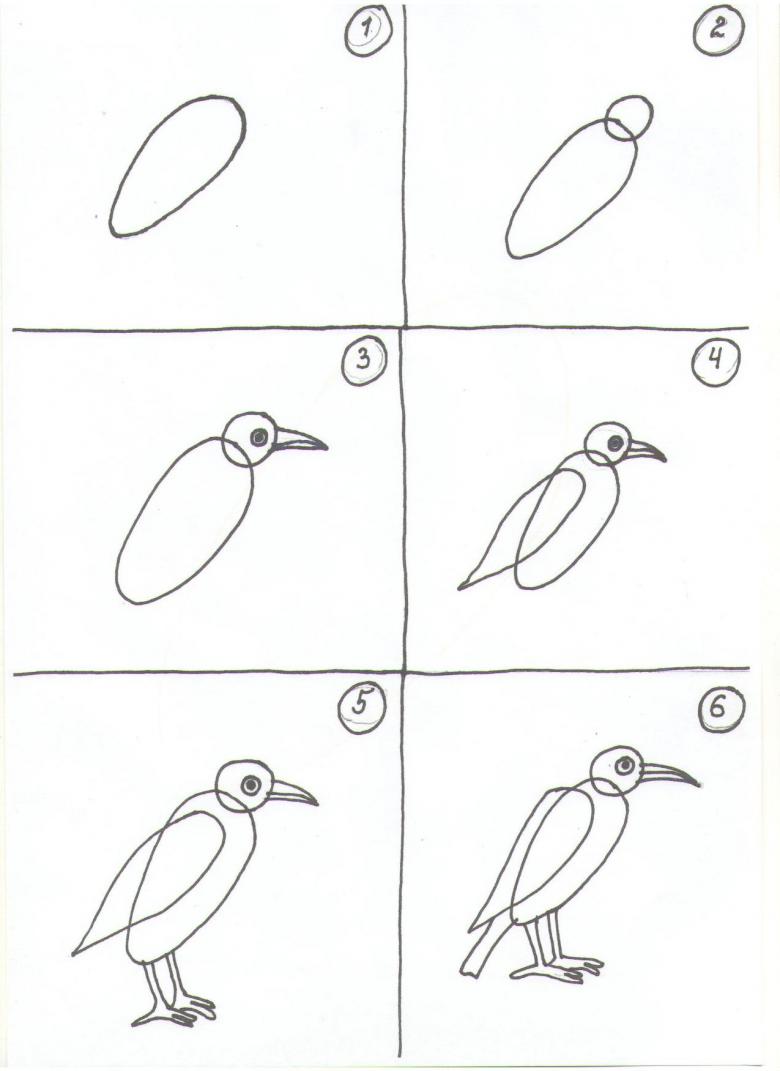
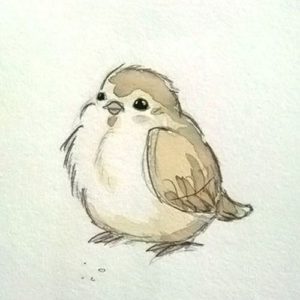
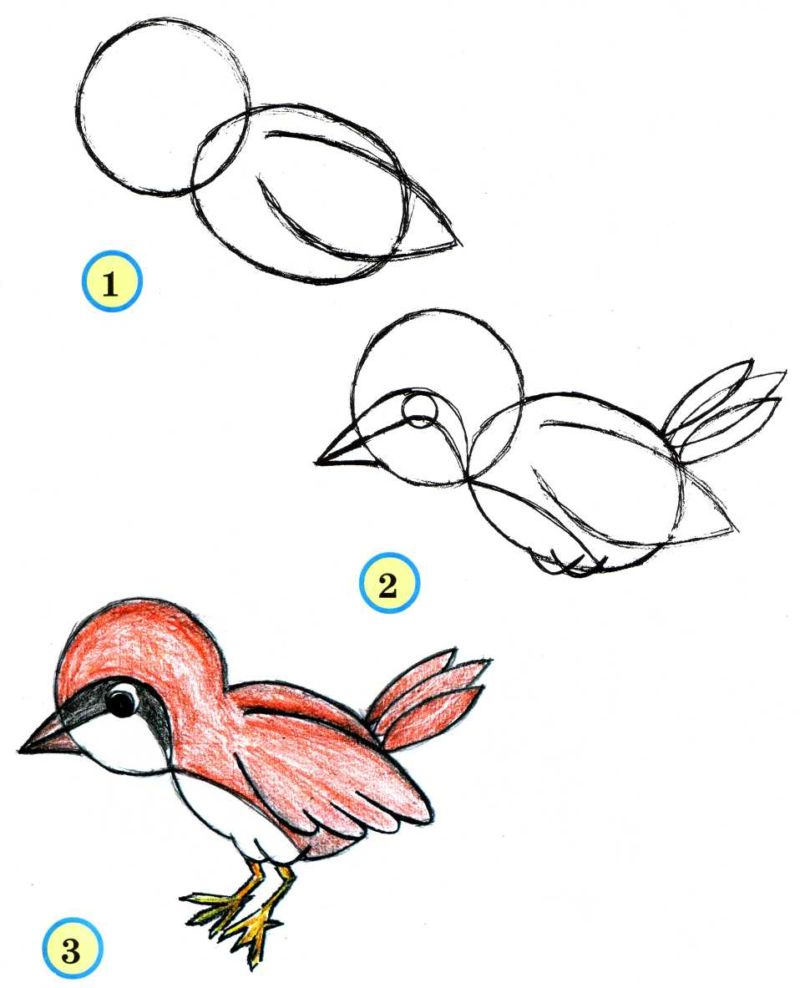
Sparrows are the most popular among wintering birds. Creating a drawing of such a bird is quite simple if you act in stages.
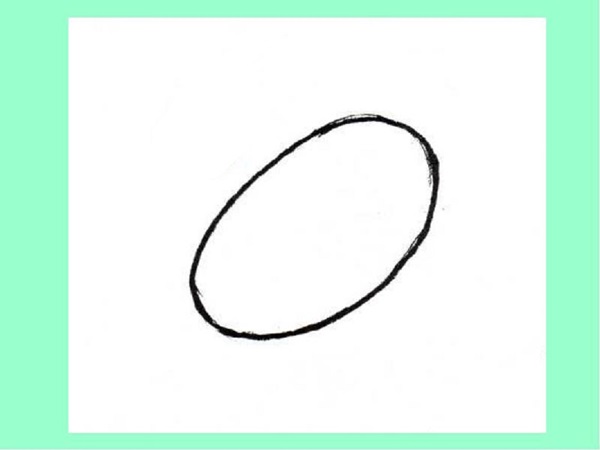
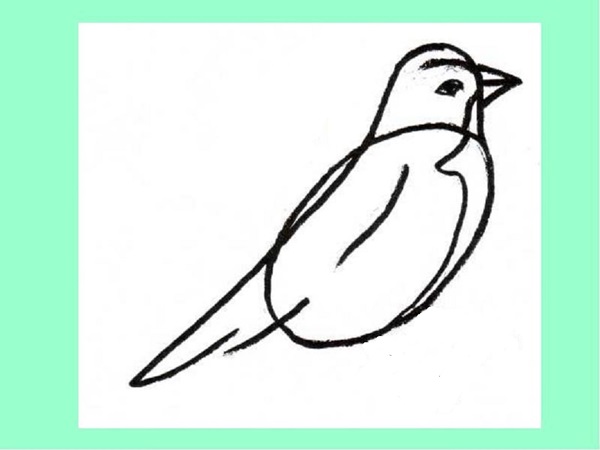
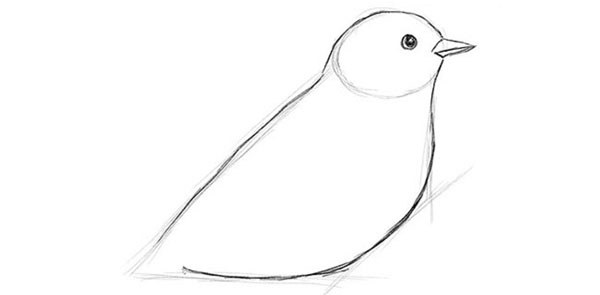
- You need to draw an elongated oval. This is the base of the body of the bird.
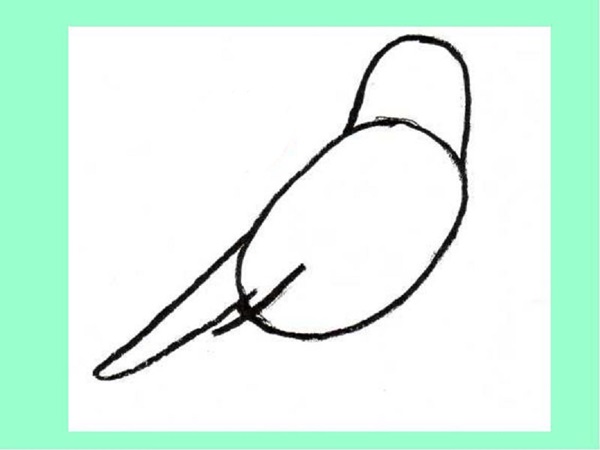
- At the top of the workpiece, you need to draw a figure with rounded contours. This will be the head. Several straight lines are drawn below. This is the tail of a wintering bird.
- Further, the beak is clearly drawn.
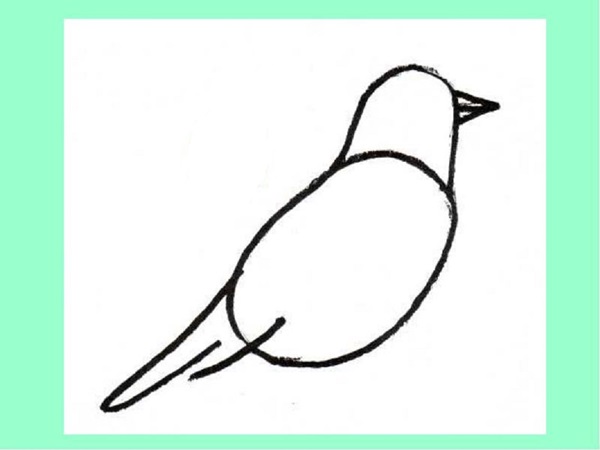
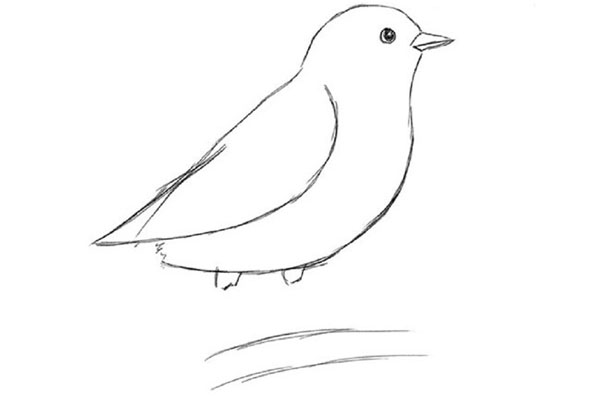
- Then you need to create the outlines of the breast, wing with smooth contours and complete the eye.
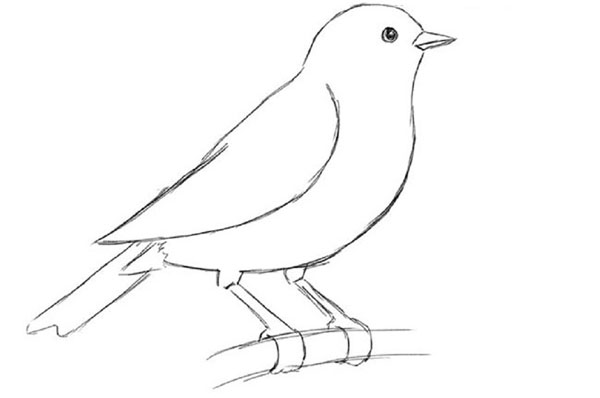
- You need to draw a sparrow's paws with a pencil.
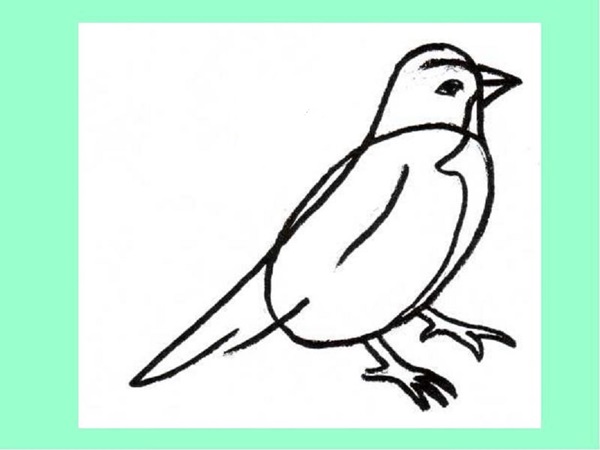
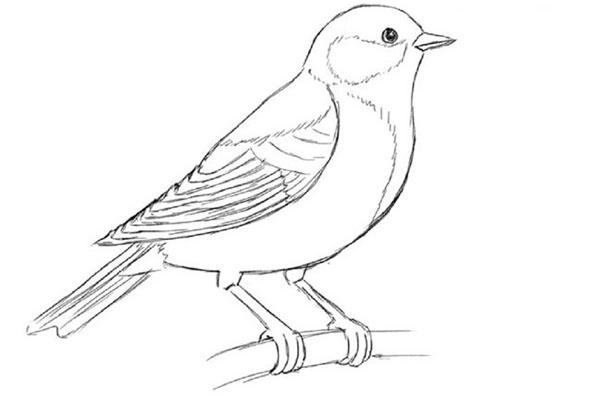
- It remains only to color the drawing using colored pencils or felt-tip pens. You can use paint if you wish.
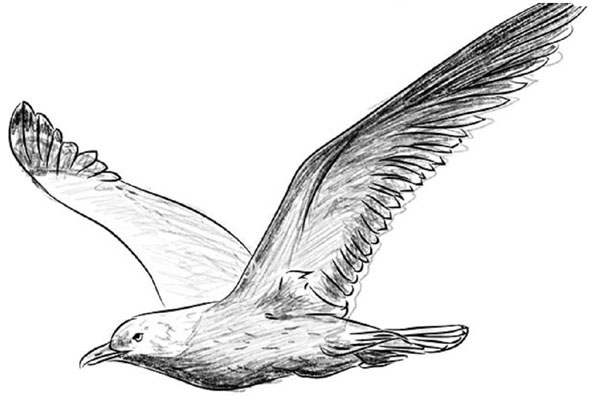
Bird in flight: draw a seagull
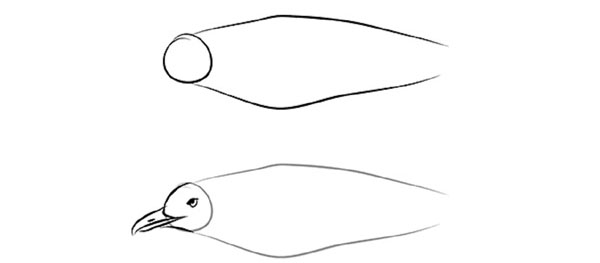
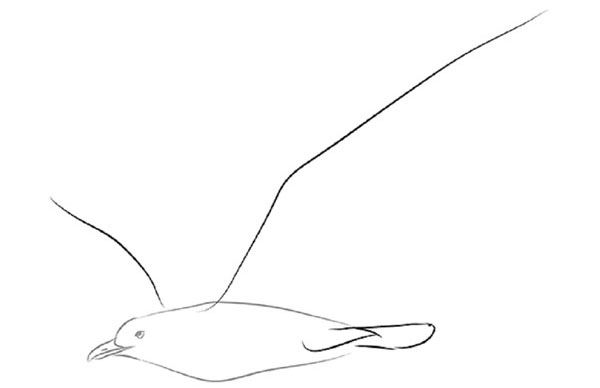
- The process of drawing a bird in flight is much easier than it looks. Even a child can cope with the task. First you need to draw a circle, which in the future will become the head, and the body of the bird. The bottom and top of the body should be a little sharp. Rounds are not needed. Then the eye and beak are drawn, after which the contours of the circle must be erased with an eraser.
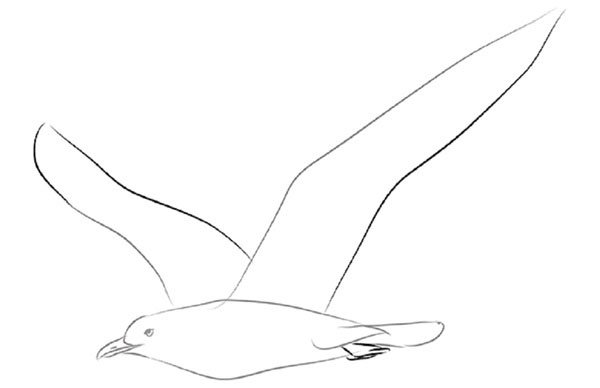
- Now we need to draw the wingspan and tail. The wing, which is located closer to the right edge of the paper sheet, should be much larger and longer than the second and the body. No need to grind!
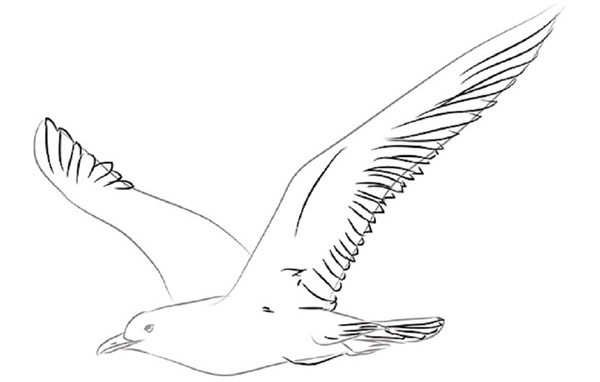
- Next, you need to finish the paws and wings. The first need to be depicted folded tightly to each other.
- Then you need to draw lines from which the thigh will turn out. To do this, the contour is drawn from the paw of the seagull down. Next, depict the feathers on the tail and wings of the bird.
- It is necessary to remove all unnecessary contours.
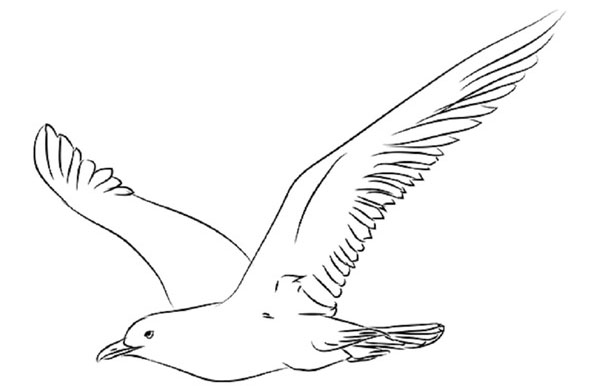
- It remains to draw shadows. The wings of a bird in flight should be made almost black and the bottom of the seagull should be very dark. Plus, a shadow also falls on the body from the wing. On the second wing, located closer to the left edge of the sheet, you should slightly outline the outlines of feathers along the entire length. Similar contours need to be done on the body and near the head.
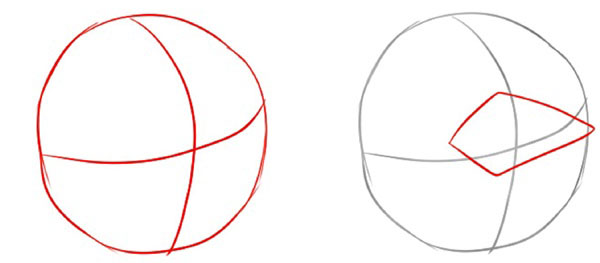
Angry Birds (Angry Birds)
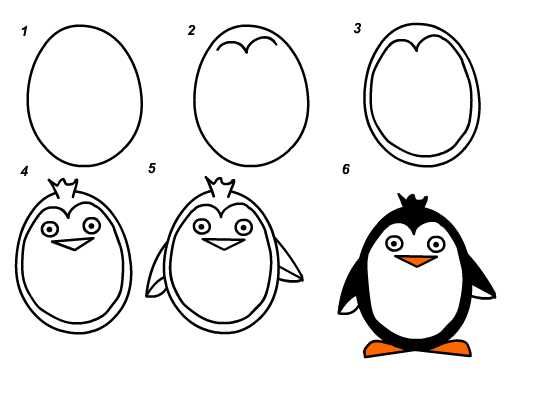
- To draw an Engry Berdz bird with a child, first you need to make a kind of scheme. For this purpose, the picture begins with the performance of the circle. In its center you should draw the contours of the polygon. Then the beak will come out of it.
- Now you need to make your eyes. This part should be deliberately voluminous and significantly exceeding the necessary ratios for such a small head of the game character.
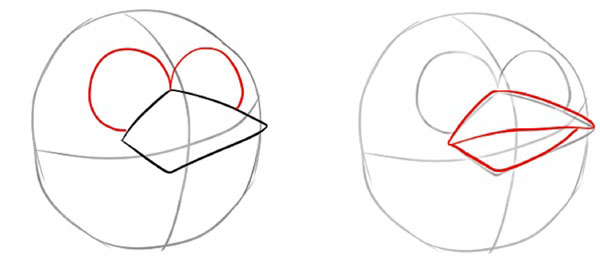
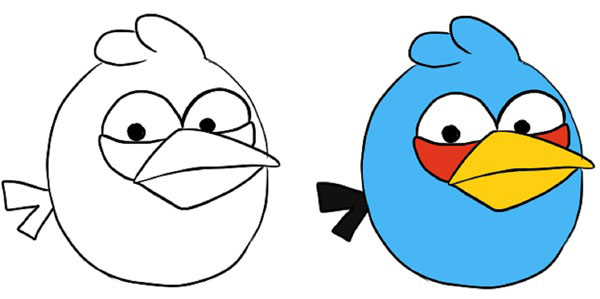
- The beak is drawn, and under the eyes it is necessary to make “bags”. This is an integral attribute of Angrybird's blue character.
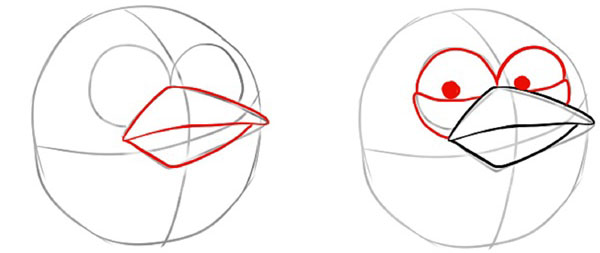
- In the upper part of the circle you should draw a miniature crest. From below is depicted even and clear lines of a small tail of a fairy -tale bird.
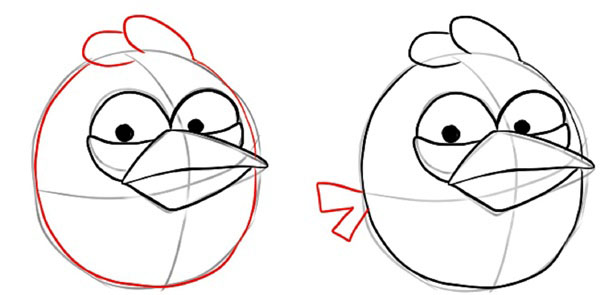
- It remains to complete the drawing process and erase all unnecessary contours of the scheme and paint Engry Berd in accordance with the features of this game character.
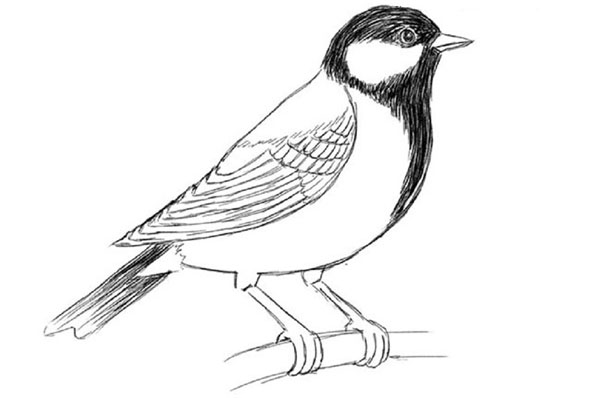
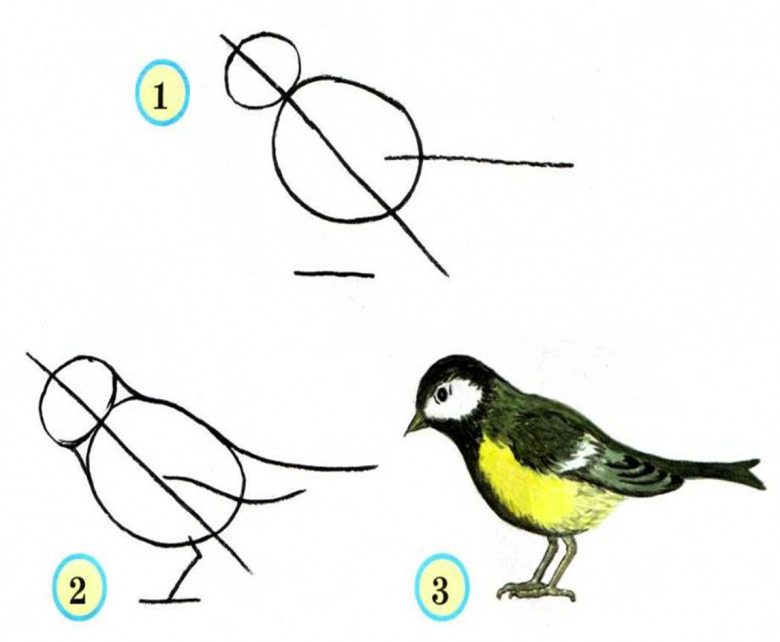
Tit
This master class is designed to help in drawing tits.
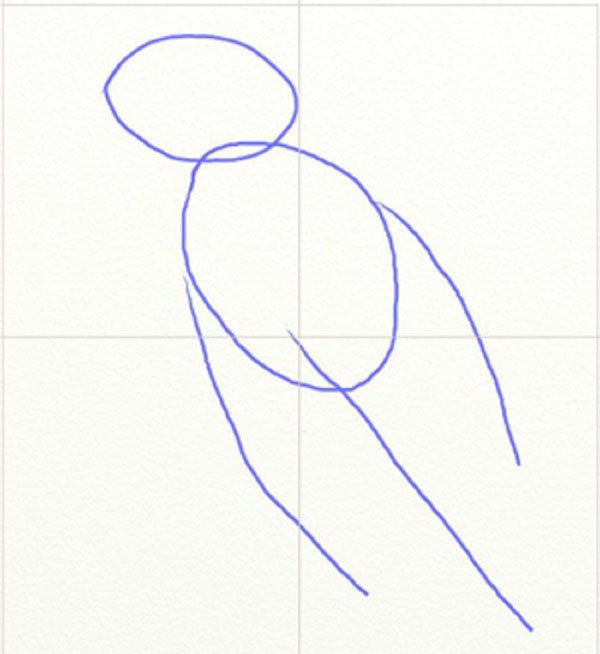
- We draw a circle: This is a future head. Direct lines make the trunk of the tow's body.
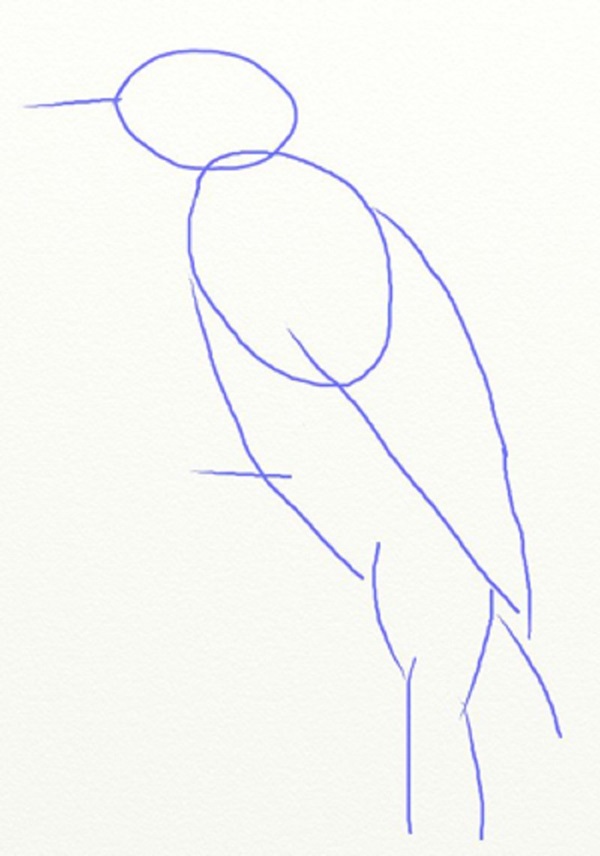
- The bird’s head give the necessary outlines. We make a tow's beak and draw the eyes in the right upper part of the head.
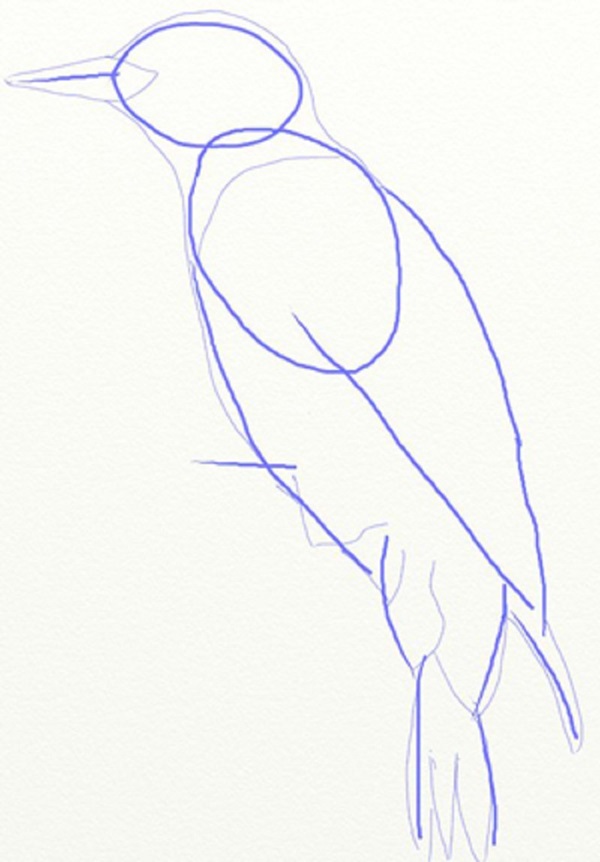
- We make the contours of the torso of the tint more distinct. The head should flow very smoothly into the body. We draw the abdomen rounded. We remove the auxiliary lines.
- Now we draw a twig. We depict the wing of the tits and the upper part of the bird legs.
- We finish the image of the legs. Draw fingers and tail.
- In small, jerky lines, we throw the boundaries of flowers. We draw feathers on the wing and tail.
- We finish the work: shade the head and tail of the tit. We draw small feathers where necessary.
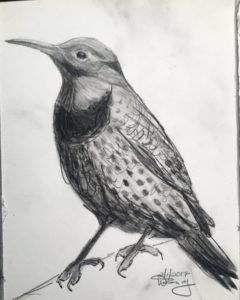
Woodpecker
Thanks to this master class, you can poetenly draw a quite pretty and realistic woodpecker. MK will help adults and children who have decided to master the technique of drawing birds.
- Schematically create the contours of the head and trunk of the future woodpecker. In this case, a sheet of paper should first be divided barely noticeably into four parts.
- Further, a sketch of the tail and beak of the bird is also schematically made.
- Now we need to draw the overall contour of the body of the depicted object and its head.
- We are engaged in the creation of details and their distinct drawing: eyes, beak, feathers, wing, etc.
- We complete the work on the nuances and wash all the auxiliary elements.
- We shade with a simple pencil all the necessary areas according to the natural coloring of the woodpecker.
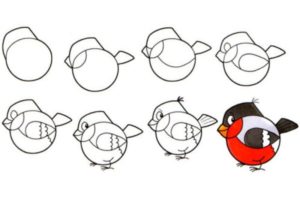
Bullfinch
The proposed detailed MK will help beginners to draw a very attractive bullfigure on their own.
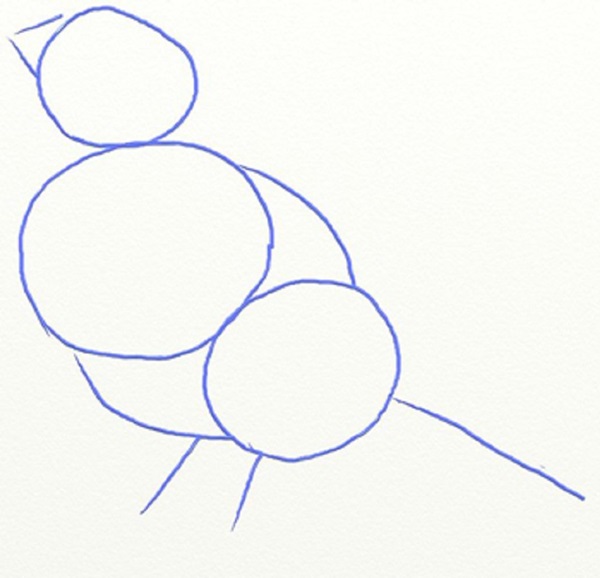
- Before starting work, we divide the sheet into four segments. This will help to make a sketch correctly. We draw, as in the picture below, 3 circles. This is the basis of the future bullfinch.
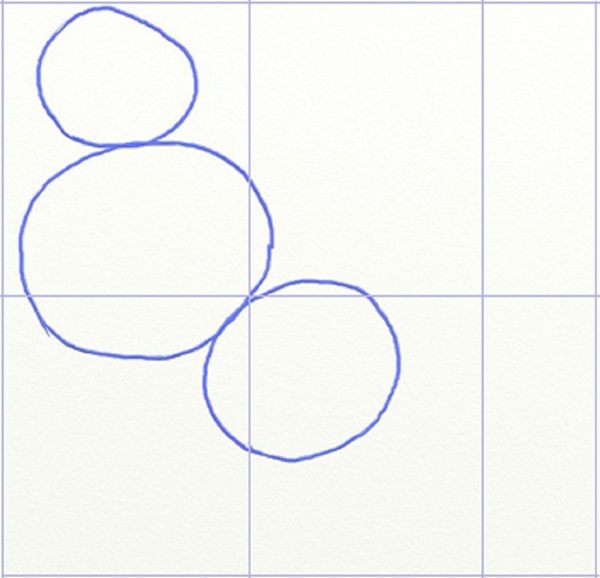
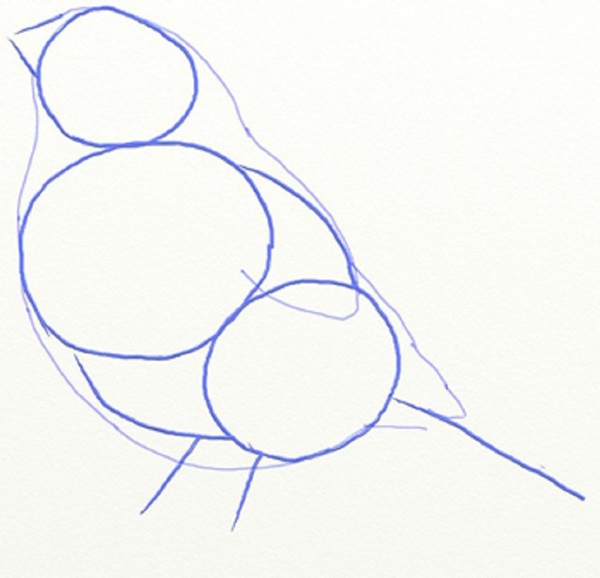
- Next, the general contour of the image is created by smooth lines.
- We circle the previously created silhouette of the bullfinch.
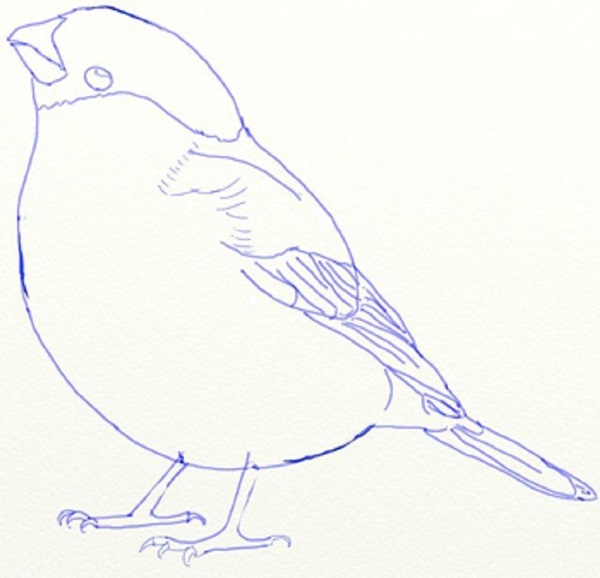
- We draw the legs of the bird and the tail. We create recognizable details of the bullfinch. Do not forget about the eyes. We wash all the unnecessary lines.

- Add small details of the foot and bullfinch.
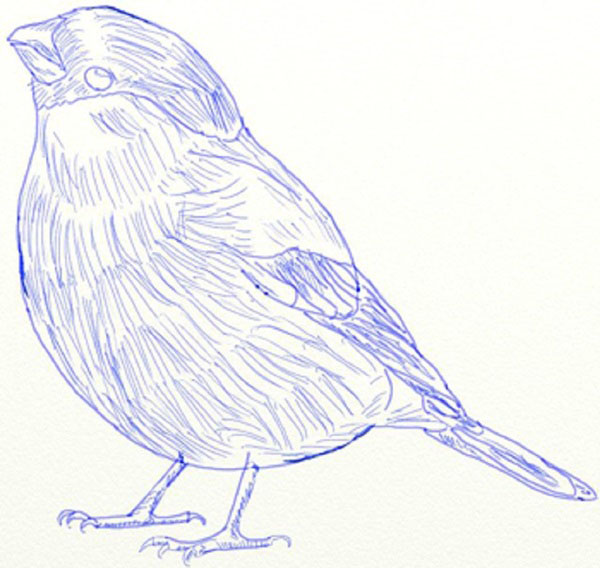
- We shade all the necessary areas.
Magpie
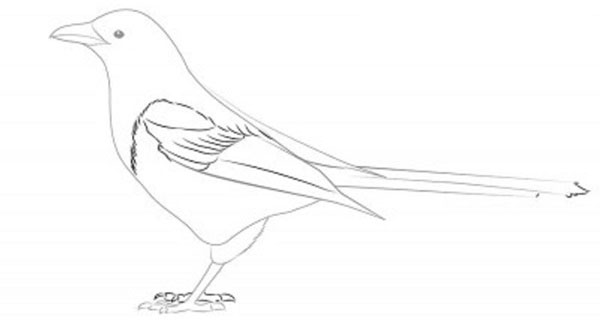
With the help of the step -by -step instructions, you can easily portray the magpie. Following the recommendations and using the drawings as hints, the bird will certainly succeed even among novice artists.
- First we draw a circle. From it we form the head of the future forty, drawing the beak and eyes.
- We make a sketch of the silhouette of a magpie. At this stage, it is important not to forget about compliance with the proportions of the picture.
- We point the shape of the torso of the magpie.
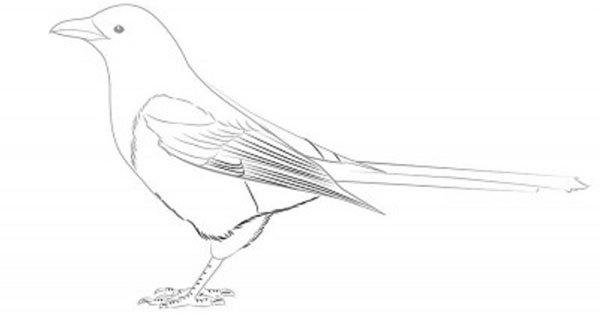
- We draw a tail, legs, wings.
- We portray other details. We form the contour of the separation of shades of forty.
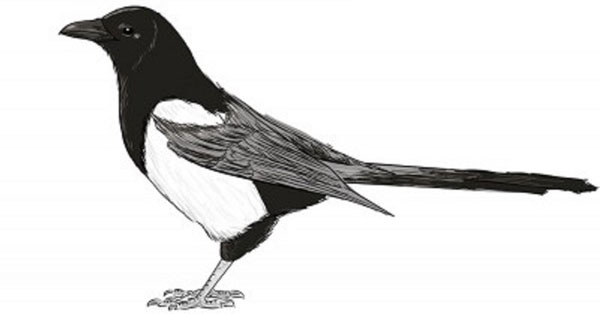
- We make a bird plumage along the lower contour. We portray feathers and wash everything unnecessary.
- We shallow all areas in accordance with the plumage of Soroka.
As you can see, drawing a bird with a pencil in stages is not very complicated. Hipples for beginners will help to cope with the task of several steps. Such drawing lessons will appeal to both the child and the adult. After all, the image will certainly turn out to be clear, realistic and original.
How to draw a bird with a phases with a pencil-light master classes for beginners
Drawings of different birds and animals really like children, and, of course, they seek to repeat them. Study in stages, portrayed birds, work is not easy. The child must study techniques and basic rules of work, master the drawing manner, to help parents to teach children this article. It examines detailed steps in the image of a feathered family in various angles.
Step -by -step drawing of a bird with a pencil
When starting to work on the picture, you need to prepare the inventory:
- Sheets A-4.
- Simple and colored pencils.
- eraser.
- Image of the bird that needs to be portrayed.
Further, the phased lesson includes a careful study of each individual part of the bird and its step -by -step performance.
Everything begins with the study of the anatomical structure, knowing how the bird body works, it will be easier to depict it on paper. As for the skeleton of birds, it is important to know:
- Studying the structure of the structure of the skeleton, a general silhouette, a comparison with the human and animal analogue, the separation of similarities and differences.
- The spine, connecting the wings, chest and hips, makes them work at the same time, thereby providing birds with a flight. This gives an understanding of how all these parts are interconnected during drawing.
- Now you can portray an easy pose, since there is an understanding that what comes out of them, and what gives in the rest.
- Having a good imagination, you can imagine the process of your flight. How the legs are located, how the hands capture the air.
- For a complete understanding of the length and size of the case of different representatives, it is additionally necessary to check the length of the legs and neck and the percentage of the ratio of feathers. So the drawing will be more realistic.
- The work of muscles in a simplified image will also expand the horizons and understanding of the subject.
- Having created a silhouette, you need to consider that more feathers will be added, they will help to complete the image.
We proceed to the next stage drawing bird paws. The structure of the foot of birds is formed under the influence of the lifestyle and the environment:
- Predators are obtained by food using sharp, hook -shaped, thick and strong claws. The middle finger in the front and the rear finger close, forming the capture.
- In small birds, the legs are formed for sitting, they have a long and thin structure, thin and sharp claws, adapted to cover branches.
- Those who live near reservoirs and get food in them: the structure of the fingers is long, thin tender. Short, not sharp claw. The membrane connection between the fingers.
- The runners have: thick, strong fingers, short, rounded, thick building of claws, resembles nails.
- In woodpeckers, the legs are adapted to climb trees, for this reason, they have symmetrical front and rear long and thin fingers, sharp, strong claws for the hook.
The legs of the birds are covered with scales, the larger the representative, the more voluminous and the legs. We have dismantled the legs, go to the beaks. They are not attached to the cranial box, and the structure is associated with diet.
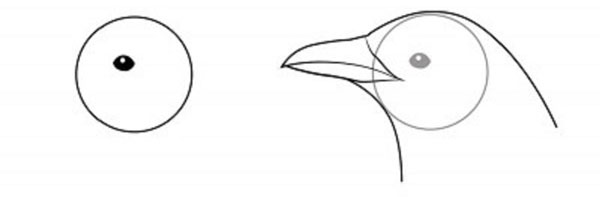
A simple and understandable image of a beak is presented in the following scheme:
- We draw an oval with the size of the head, draw a line from the circle to the end of the beak.
- Divide the image of the beak with a 2/3 line.
- Clarify the form and complete the drawing, drawing 2 sides and width between them.
Excellent, we continue to work, the silhouette of the bird is already tracing quite well, we go to the image of the eyes. Everything begins from the circle, then the dark contour is added and at the end there are rings around and pupils. The predatory birds additionally decorate the eyebrows, making their appearance reasonable, in the night residents of colored yellow or orange shades of the eyes and wide pupils, and small birds wear eyes – beads.
Featers form the body of birds, they have layers of different sizes and shapes, they are not distributed evenly and this is important to consider. The layers are distributed along the contour of the muscles and this greatly simplifies their application to the finished image. They are divided by drawing and color pigments. As soon as all feathers are distributed, wings are drawn, and the tail ends the theme. It has the shape of a fan, has a short base on which feathers are attached, has a symmetrical shape.
On this, step -by -step instructions are completed, we proceed to the practical part, drawing how the birds look during the flight.
Sealing the moment of flight
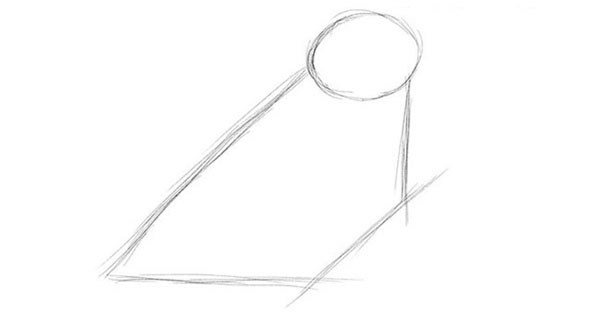
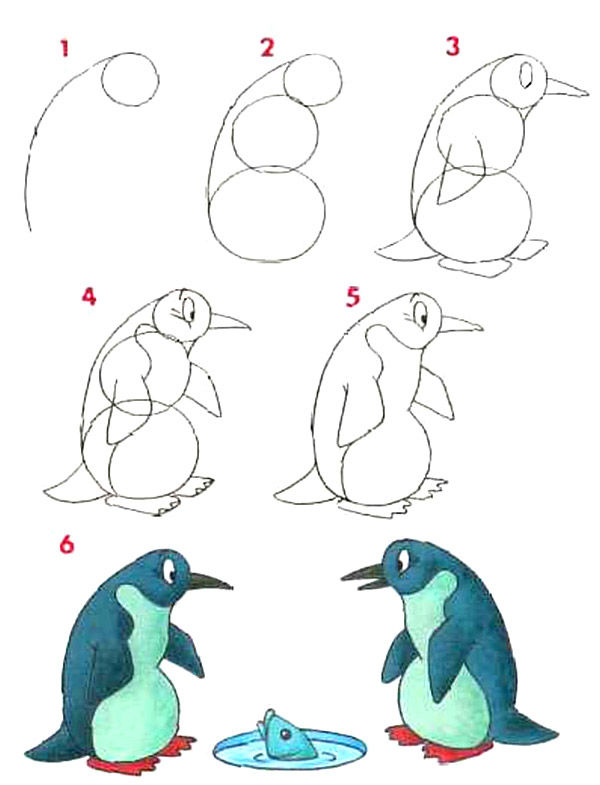
Take a seagull as a basis. The process itself is quite simple, even children can do:
- A circle is drawn, the base for the head and body, the lower and upper part should be slightly sharp.
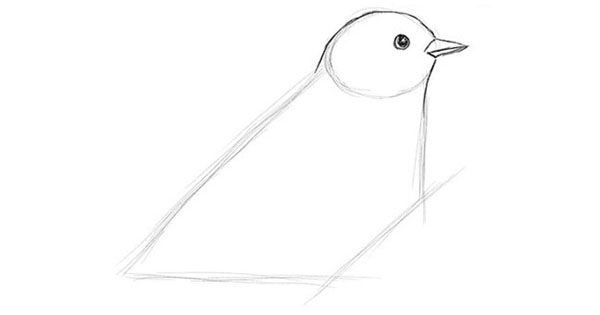
- Eyes, beaks are drawn, then the circuit contour is removed using an eraser.
- Depict the wingspan and tail in flight mode.The wing placed on the right edge of the sheet will be larger than the left wing and in proportion to the whole body.
- Paws folded together are drawn, hips are drawn using a line from the paw down and wings.
- Everything is decorated with feathers and in conclusion there is a tail.
- Errors and unnecessary contours are cleaned up.
- Shadows are drawn, the wings themselves are black and the lower part of the bird is darkened. Shadows also come from the wings.
- The work is completed, we appreciate your work.

This completes the first stage of mastering the wonderful world of birds in the visual arts. If the topic was interesting and aroused creative interest, it is worth continuing to study it and practice, improving your skills and results.
How to draw a freedom bird
Representatives of the bird world are found in nature in an amazing variety, they symbolize the sky, freedom, life and abundance. Sketches of birds often appear in children's albums.
Drawing birds is not only exciting, but also informative, because children get acquainted with forest, domestic and exotic individuals.
Parents should tell the child about their value for the natural environment, the features of the anatomical structure and differences, sometimes even watching the winged singers from the window and feeding them in the winter.
How to draw a bird
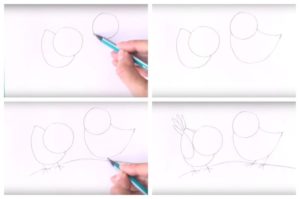
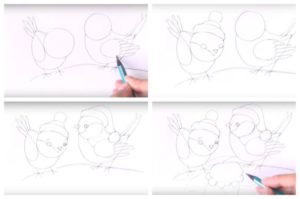
The process of drawing birds will be greatly simplified if you follow the recommendations and train regularly, stuffing your hand. Master classes will be useful for children of all ages, helping to cope with a difficult task, while mastering artistic skills.
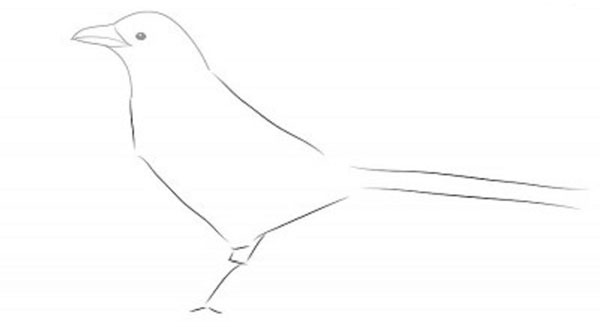
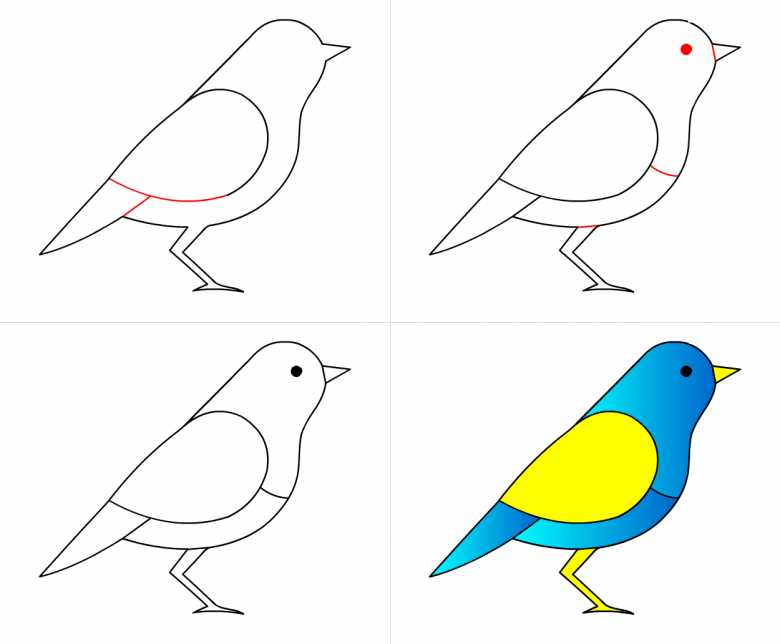
Let's try to recreate this expressive image step by step:
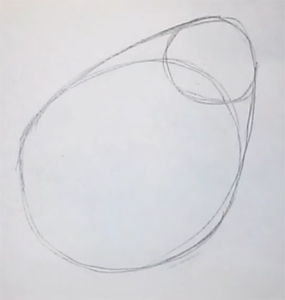
- The work begins with two circles with cross-shaped lines at the smaller upper figure.
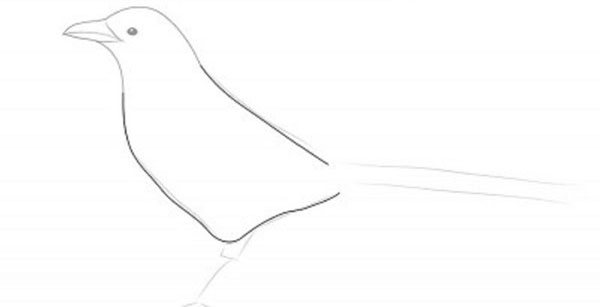
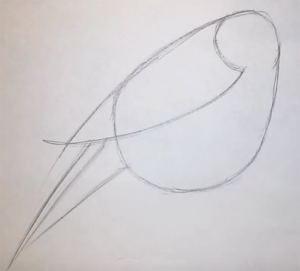
- We outline them with smooth lines, continuing the back, ending in a tail.
- Draw the legs with three fingers.
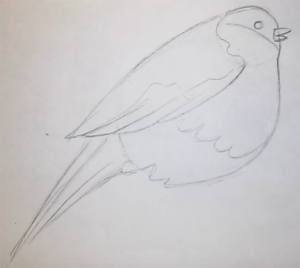
- We depict round eyes with eyebrows and characteristic ears.
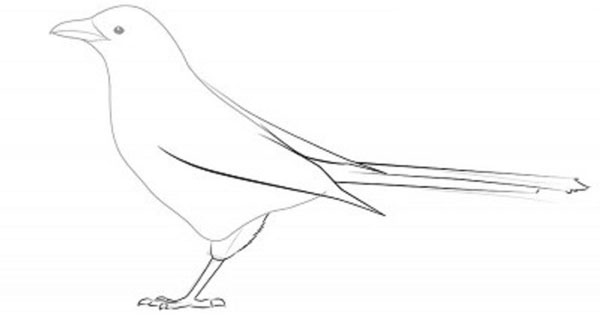
- Below we have a beak that looks like a hook.
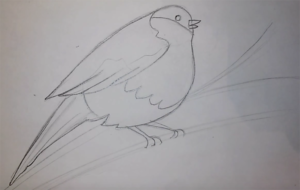
Now you need to display the plumage, lying in rows on the wing, tail, and fluff on the chest, transmitted by hatching. The pencil drawing of the bird is ready.
Penguin
Not flying, but floating, recognizable from cartoons and movies, the specimen also belongs to the feathered family, its appearance is easy to reproduce in profile. You will need to outline a vertical egg, ending with a small head with a beak. We draw a short tail and legs.
The most important thing is to correctly paint over the picture with paints or felt-tip pens – the head region, the back with wings-fins of black color, and the abdomen – white.
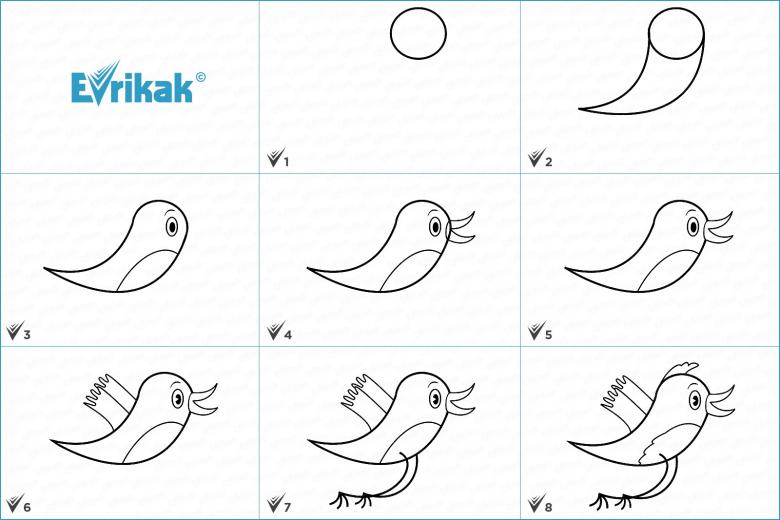
chick
The proposed version of the image of the chick is simple. We lead an arc from bottom to top, ending with an arrow-nose. Next we apply an eyeball with a pupil. From the arrow we continue the bow to the starting point, ending with a tail. We paint on an arched wing and thin legs.
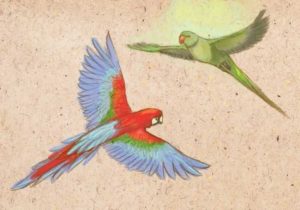
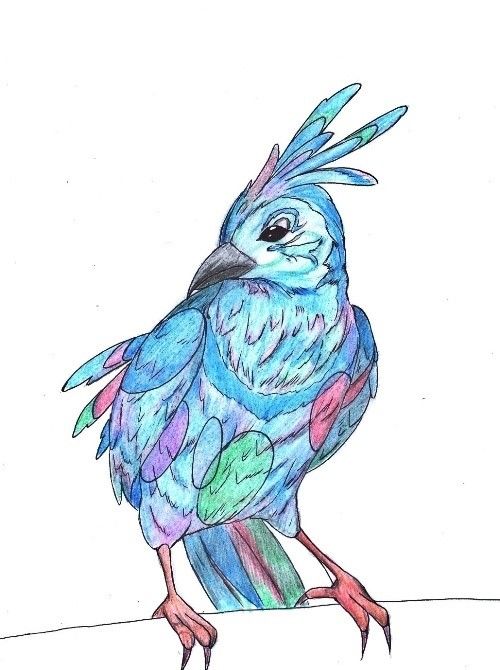
Parrot
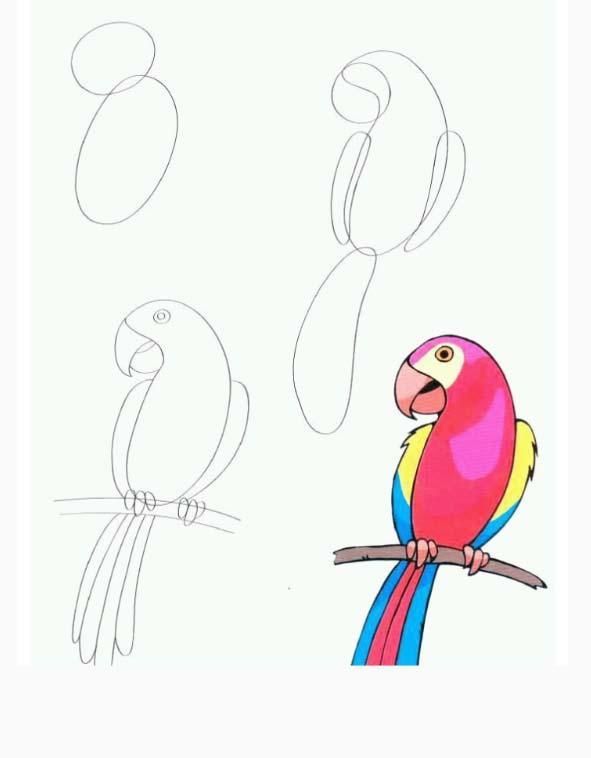
Many keep these bright individuals at home, let's draw a catchy bird in stages:
- We sketch a diagram of 2 ovals, on the left we draw a line-back, turning into a falling tail.
- With a semi-rounded ruler we denote the bottom of the wing.
- We draw a beak-hook, eyes-circles and paws.
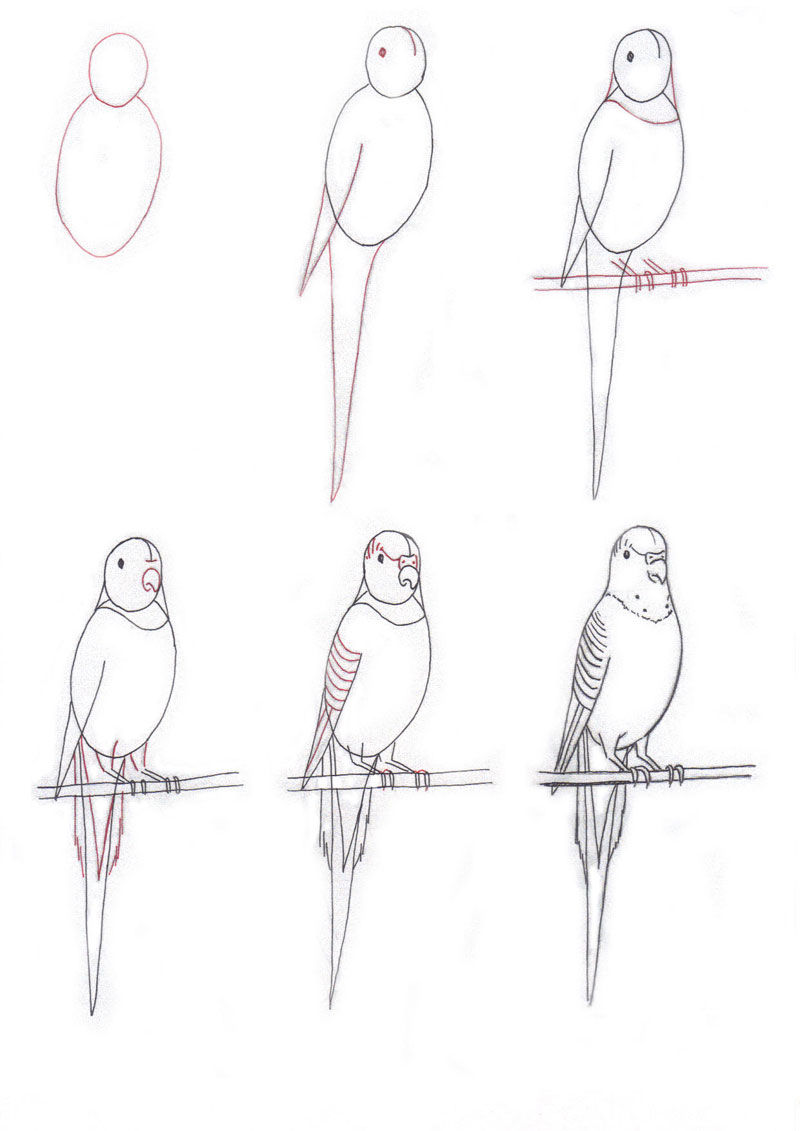
We proceed to contrasting coloring, conveying the feeling of feathers. We use red, blue, yellow. With a black tonality, we highlight the base of the beak and the edges of the feathers.
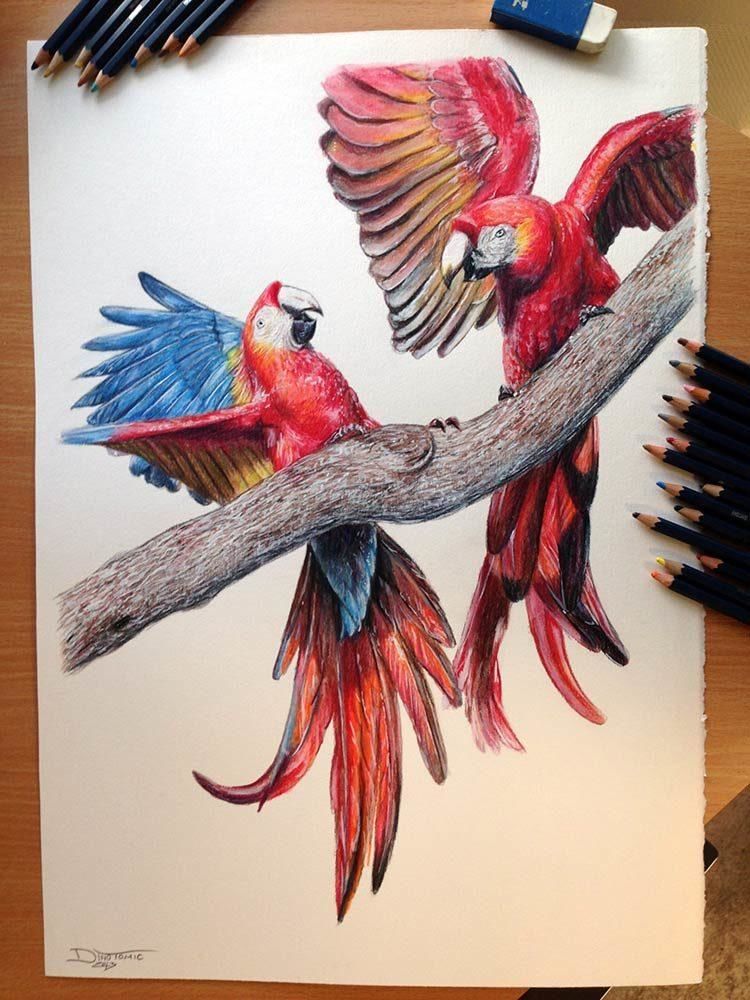
If you want to capture a parrot in flight, with a pair of arched rulers we show outstretched wings with an arched lower edge, his face will be in a half-turn towards us, supplemented by a beady eye and a hump nose.
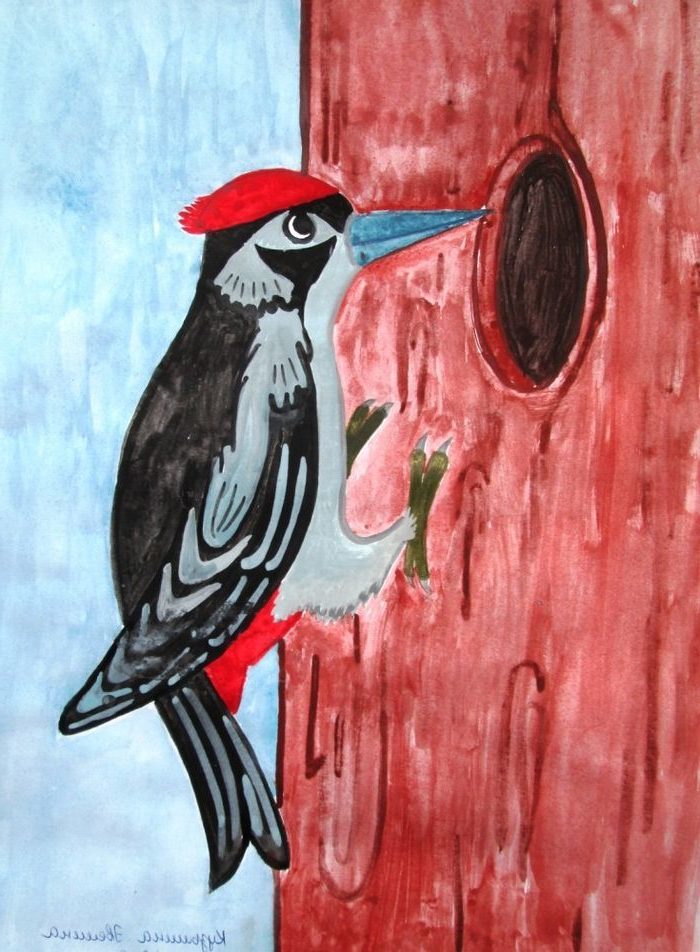
Woodpecker
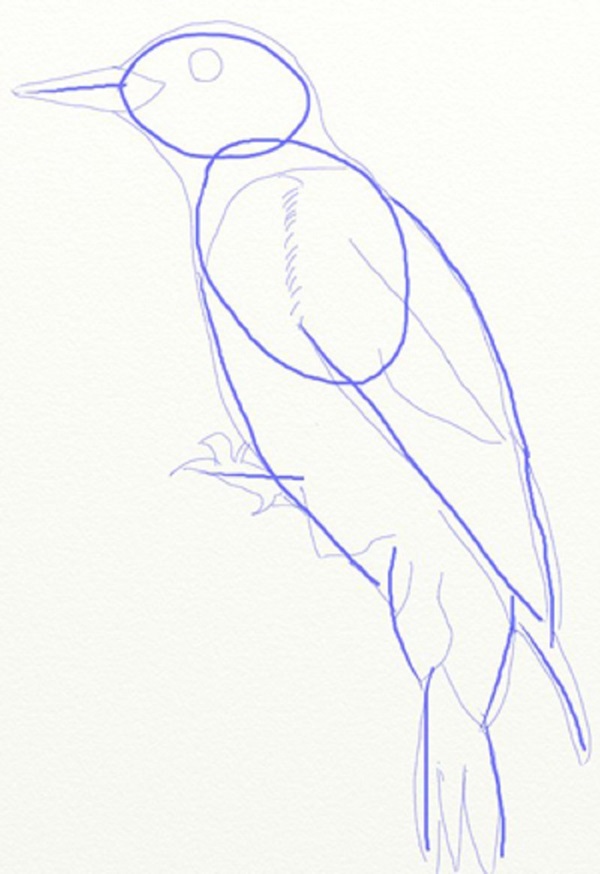
Cautious and beautiful pichuga by knocking on a tree trunk not only gets food for itself, but also lets these other “relatives” know about the boundaries of its territory, attracting females in the spring. Procedure:
- We draw an oval head and a body with outgoing wings.
- We draw the line of the beak, paws and move on to the hanging tail.
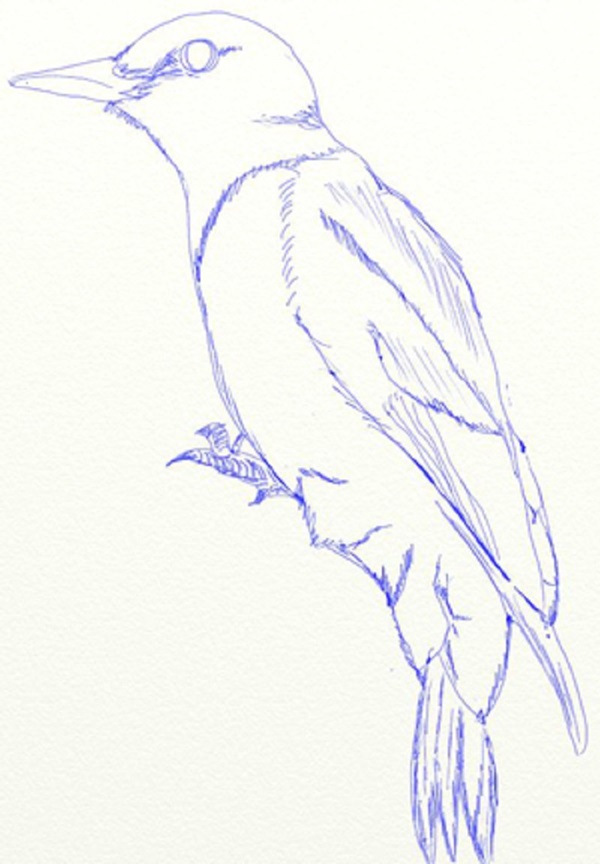
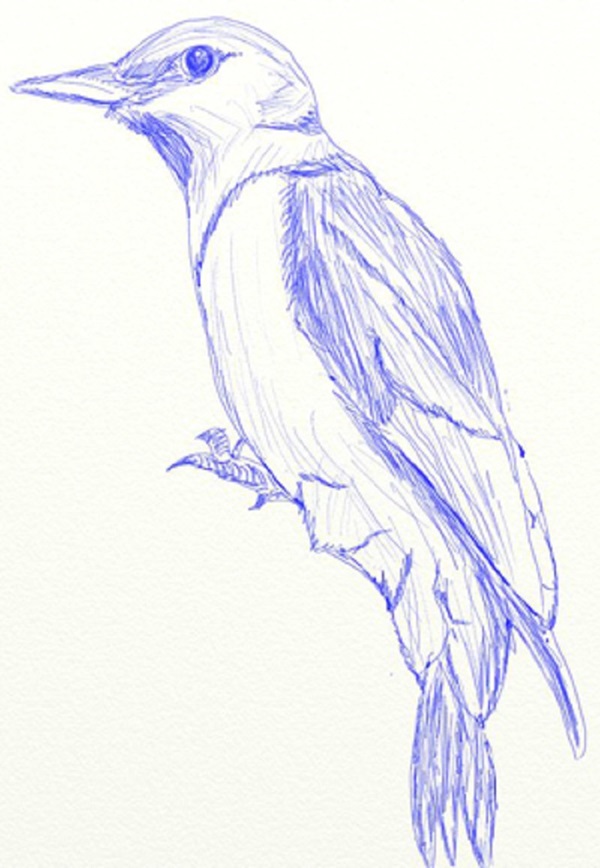
- We detail the wing, tracing the contours and highlighting strokes-feathers.
- Delete unnecessary lines and give refinement to the eye.
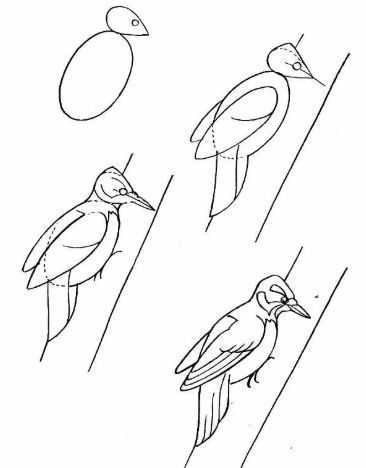
Decorating will add realism – a red head, a little white chest. We emphasize the beak and other fragments of the body with black coloring.
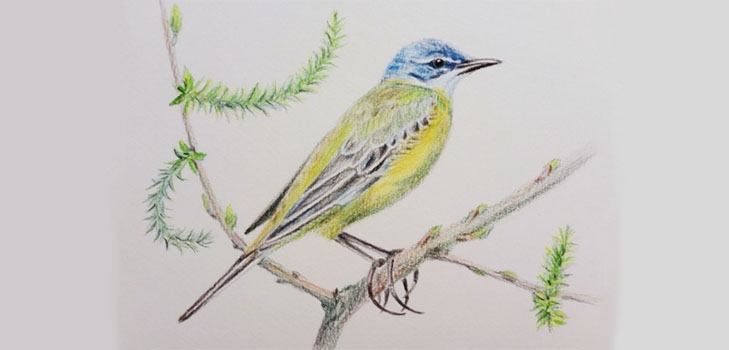
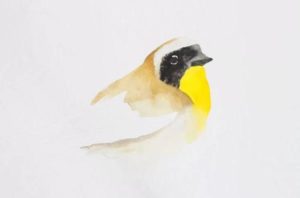
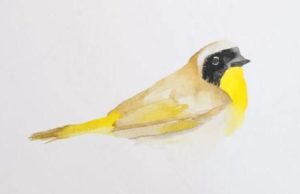
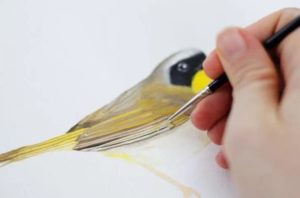
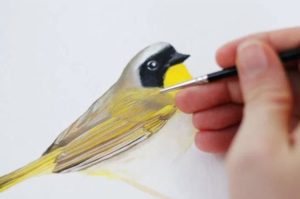
This handsome man has long legs, an egg-shaped body and a small head with an elongated yellow nose. Having completed the sketch, we specify the details. Draw the raised wings in a row of rulers.
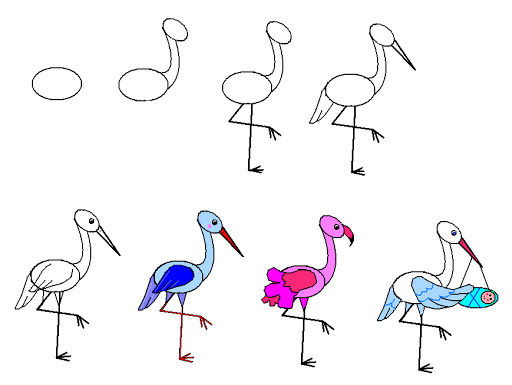
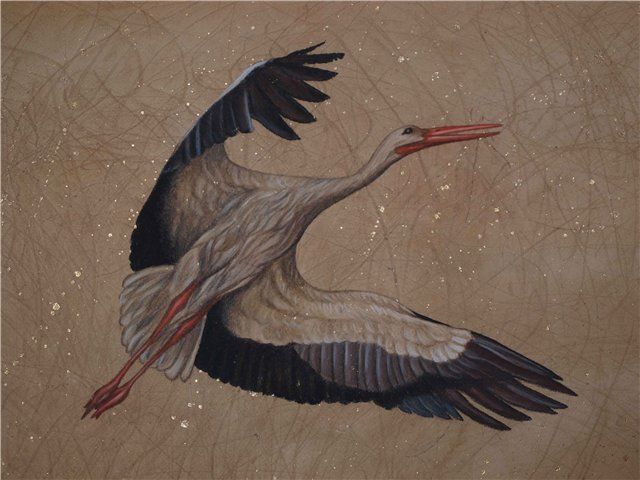
The ankle-length yellowish limbs have a thickening in the middle. The air inhabitant has a snow-white color with a gray-blue tint at the tips of the plumage. Strokes emphasize the fluff in the chest area.
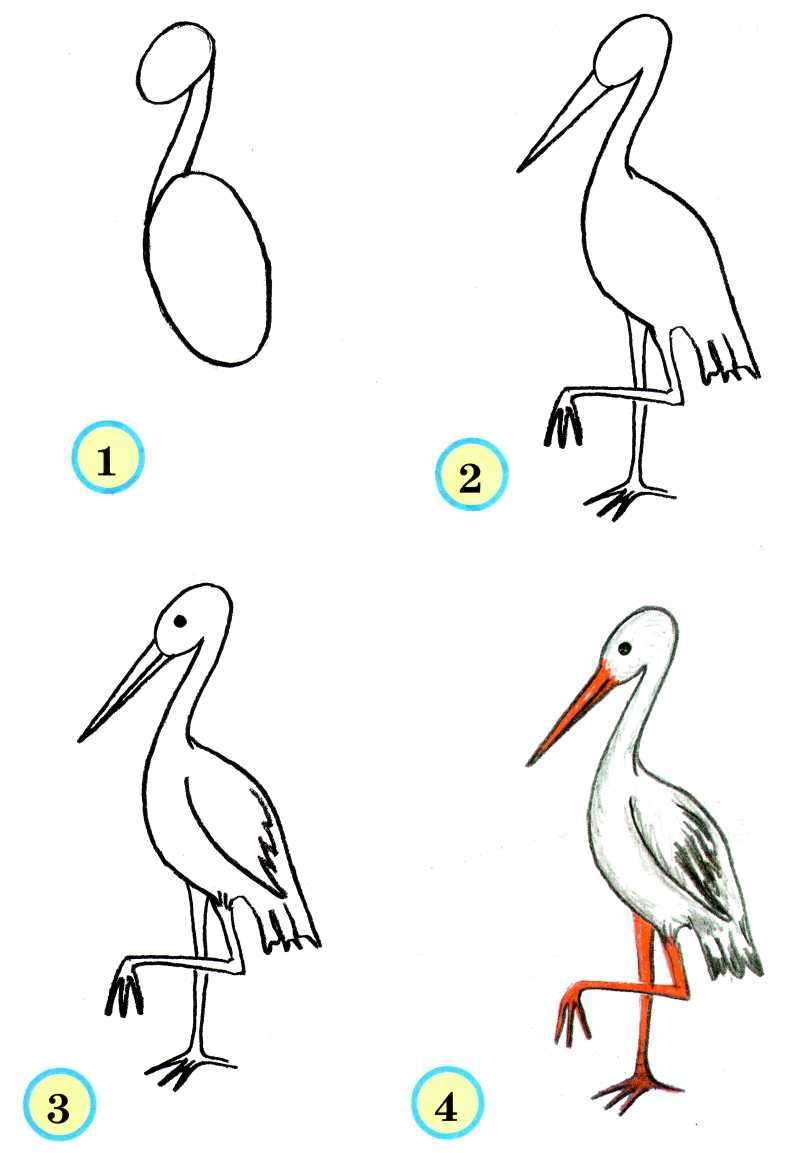
If you took up the heron, then give her neck a greater bend, and draw a crest on the back of her head, let her keep her balance on one limb, tucking the other, as she is accustomed to do when hunting for river animals.
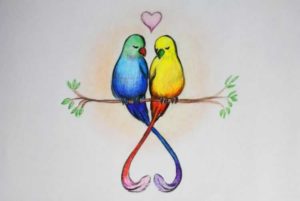
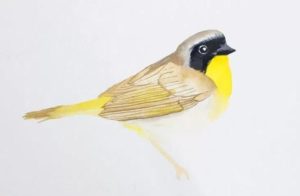
Bullfinch
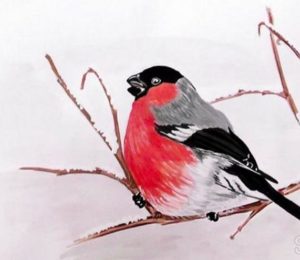
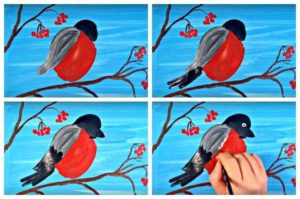
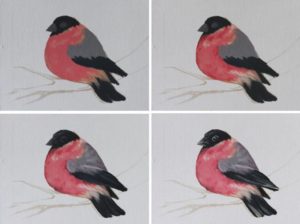
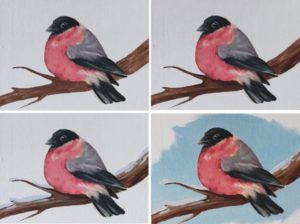
Let's depict a small bird with a colorful view that does not fly away for the winter to hot countries:
- We draw an oval body and a circle head.
- From them we draw a line that turns into a wing.
- We fix the neck and tail segment.
- The paws will cling tenaciously to the branch.
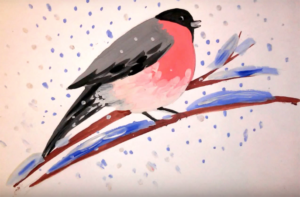
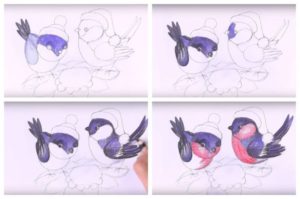
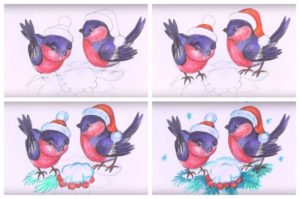
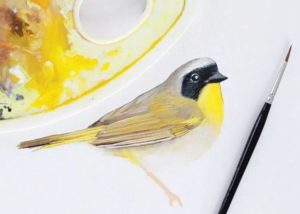
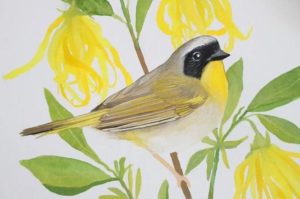
We color the figurine – a bright red breast, a little white spot under the eye, resembling a bead with a dot, a highlighted darkened plumage.

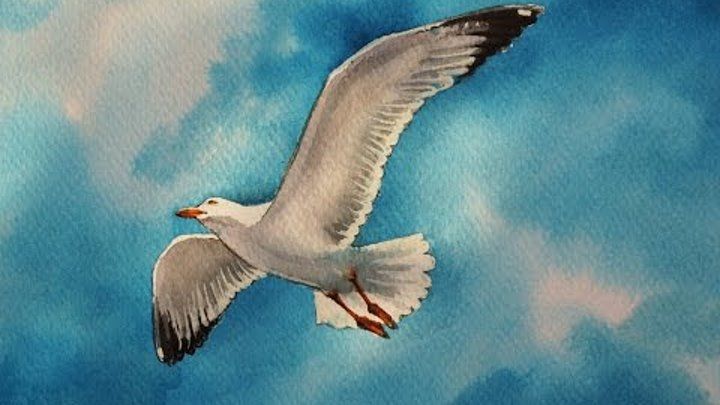
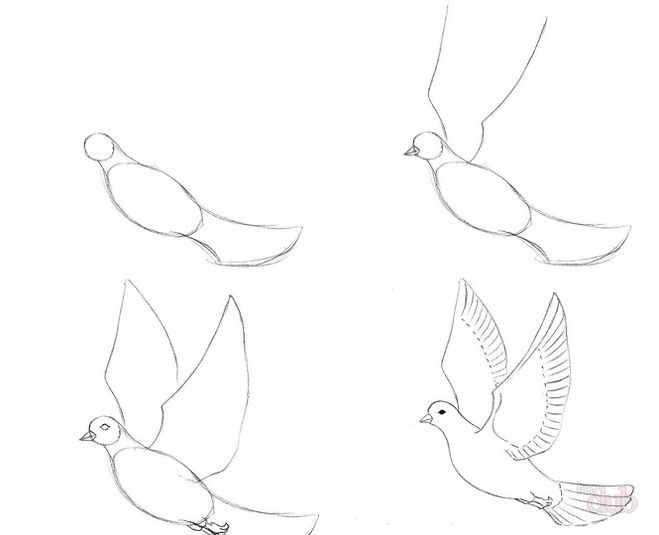
flying seagull
At first, the task seems difficult, however, it is within the power of the child:
- A round head and an elongated body with a lower bulge are outlined.
- The near wing has a more elongated format compared to the far element.
- The continuation of the figure will be the tail.
- The bird's legs are folded and pressed.
- Displaying zigzag feathers more accurately.
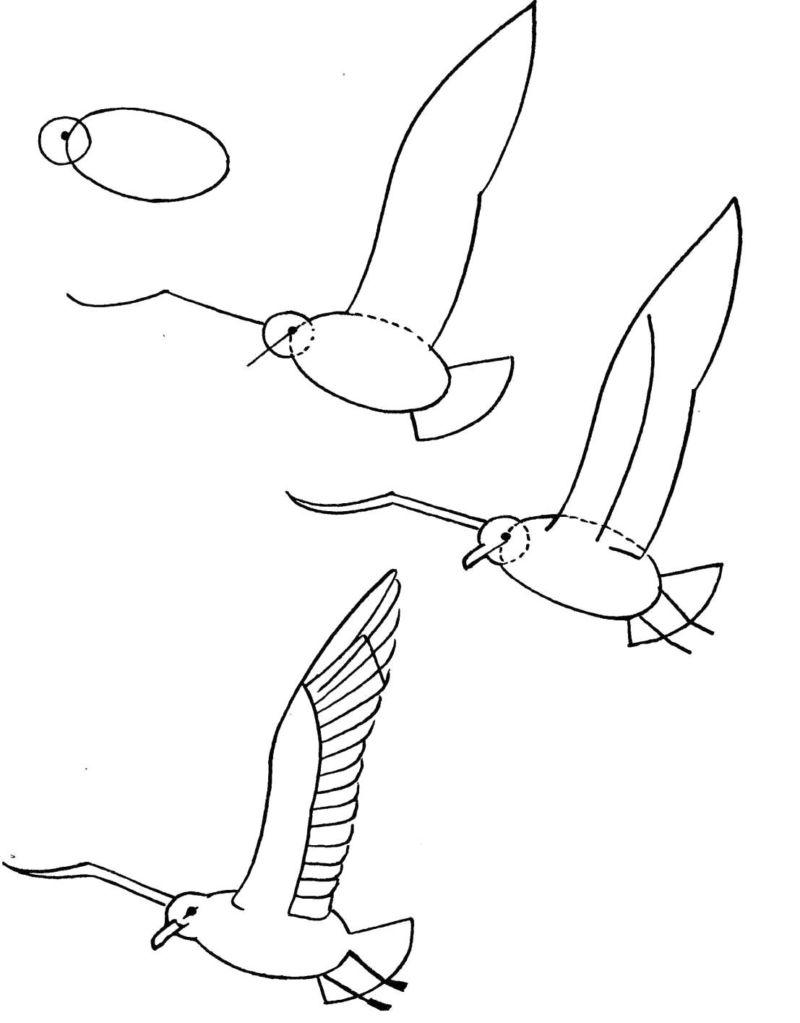
Hatching shows the fall of the shadow. It is worth noting that the dimensions of the wings of the flyers increase in direct proportion to the size of the hull.
small breeds
Sparrows are the most common family, their oval body is equipped with a round head and a triangle beak. Draw a wing, an eye and thin legs.An interesting titmouse with a rounded yellow belly.


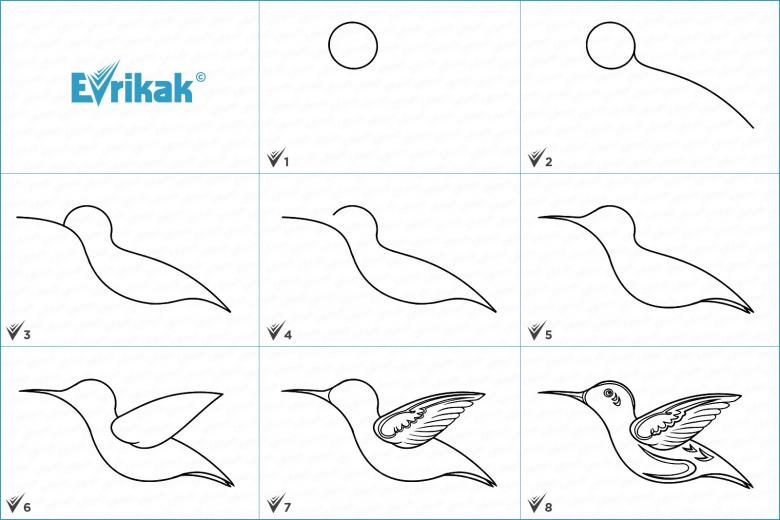
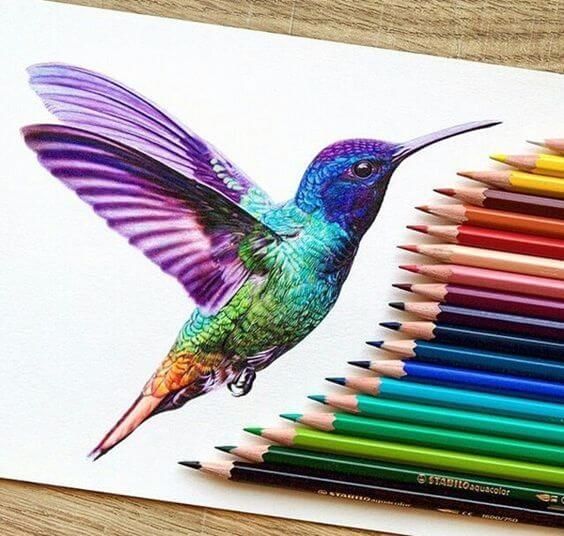
The smallest pichuga is a hummingbird, distinguished by a long nose, thickened at the base, with which she drinks nectar from flower buds, she also earned fame for her ability to fly backwards. The picture will turn out to be plausible if you carefully work out the feathers of the birds.

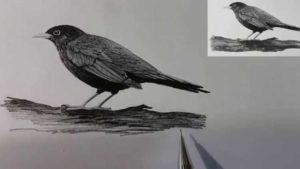
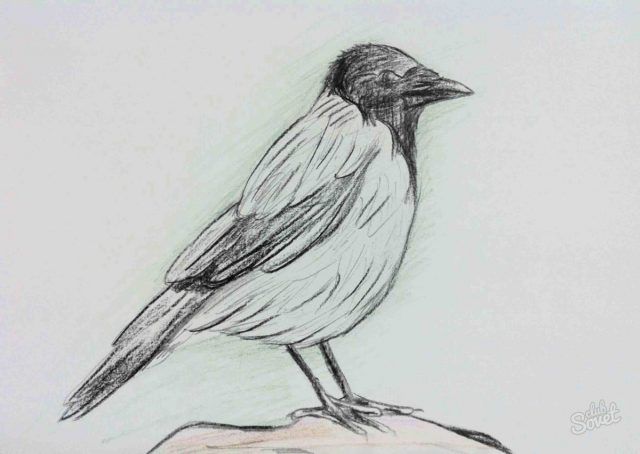
Crow
Crow flocks have chosen places close to humans, these birds are quick-witted and smart. We offer a way to draw this bird easily and simply:
- On one diagonal we draw contour sketches of the head and torso, thickened towards the bottom and a triangular tail.
- We connect these details with a stroke, drawing a beak and two paws with claws.
- We detail the wing and give the tail section a flat look.
- Having removed the basting, we proceed to the plumage.
- We designate a highlight inside the eye, from it there is an additional curve to the beak.
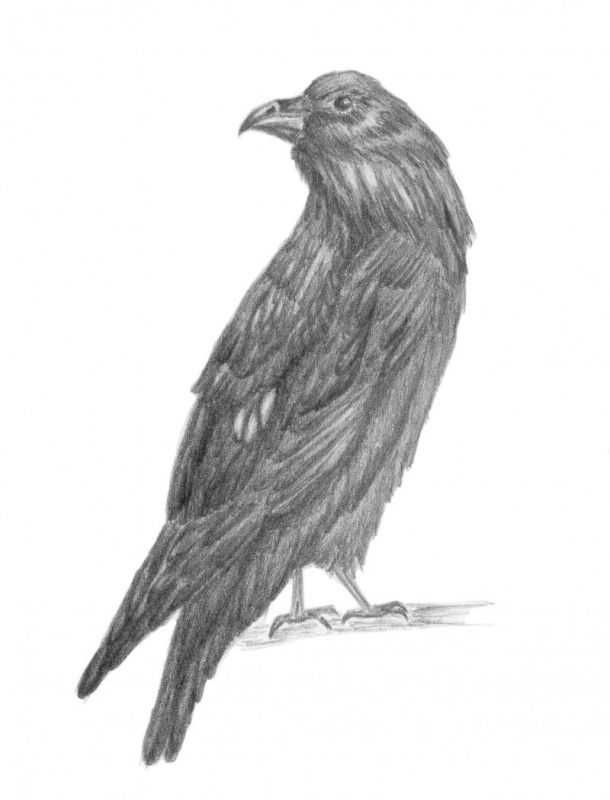
You can start hatching with a black pencil, emphasizing the feather coating with contrast. If you chose the image of a magpie, then remember its peculiar black and white color and long tail.
Unusual specimens
There are varieties that cannot be confused with anyone. For example, this is a heavy pelican, with a bag-beak, where he keeps fish or a toucan with a special structure of a voluminous nose-beak.
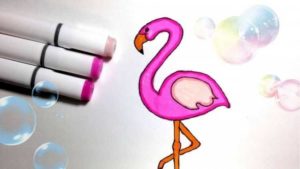
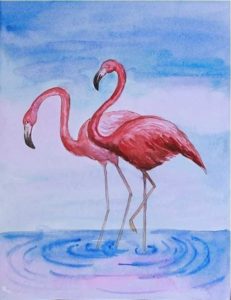
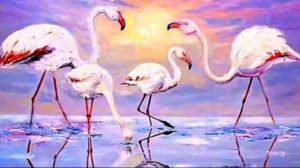
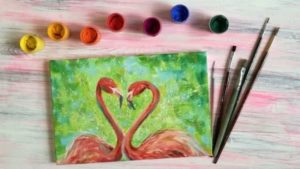
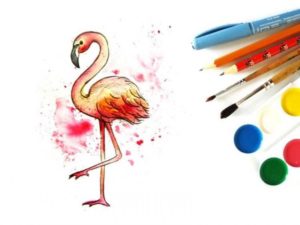
Graceful and spectacular are pink flamingos on elongated legs, and the nimble swallow is distinguished by a forked tail and erected nests-huts.
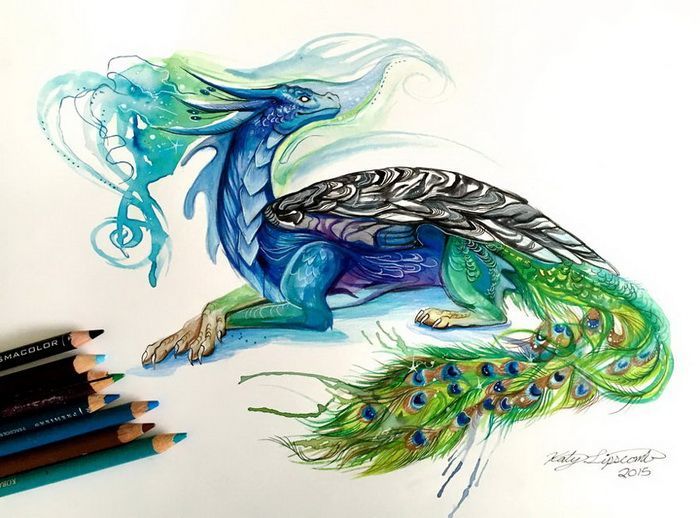
The highlight of the peacock is a chic blooming fan-tail with diamond-shaped color patterns, and its head is crowned with a “crown” of corollas with circles.
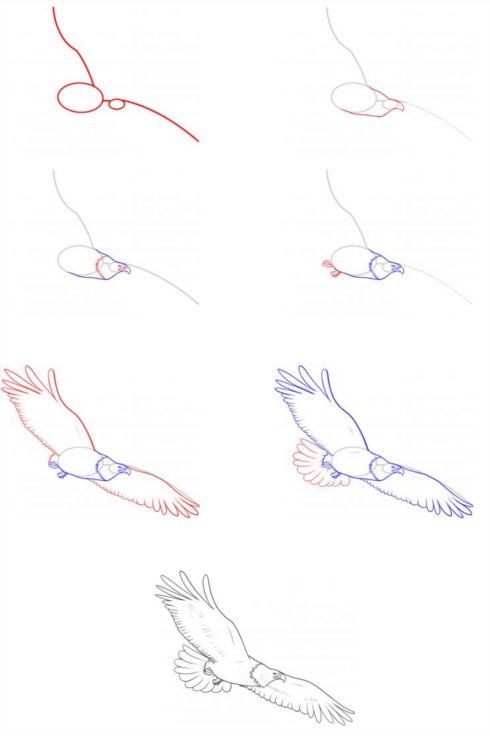
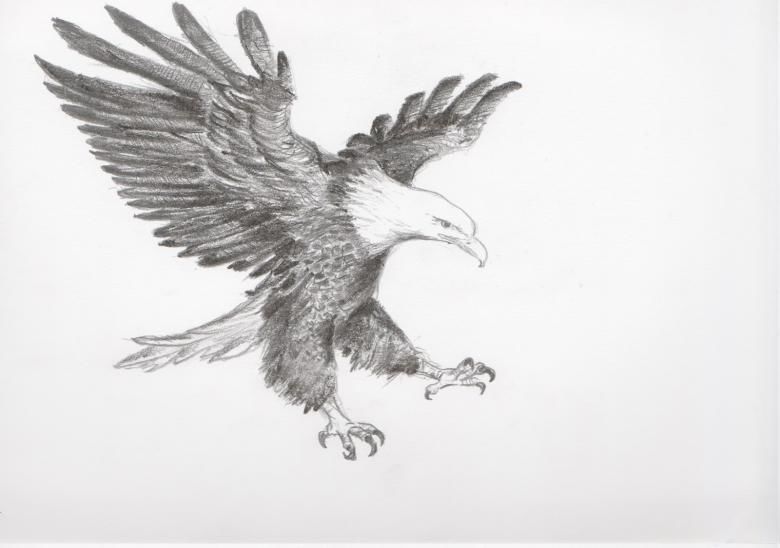
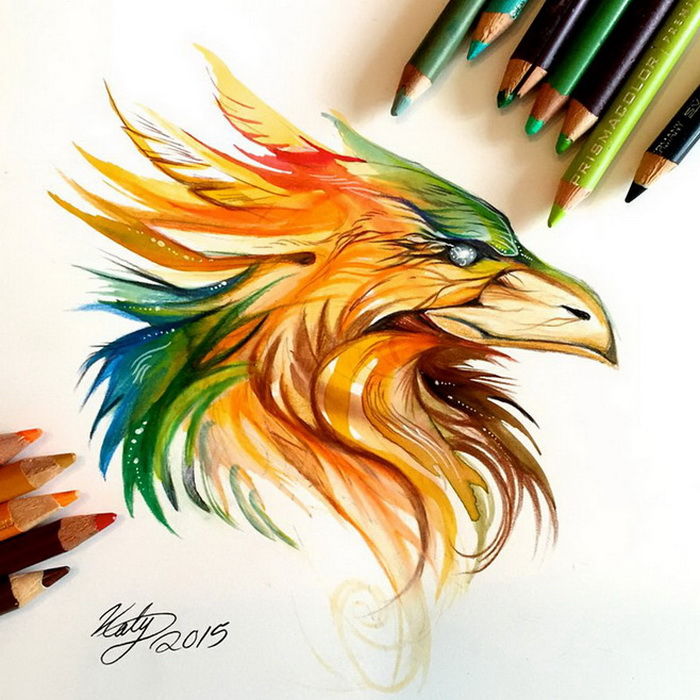
Let's depict a formidable eagle:
- We make a general sketch of the body with all its fragments.
- We start detailing from the head with a slightly open beak-hook and an eye with a pupil under the eyebrow.
- We approach the back, dropping to the tail.
- The sitter has sharp claws on large paws, and specific “panties” on the shins.
- We convey plumage on powerful wings with hatching.
We paint on the stump on which the predator sits.
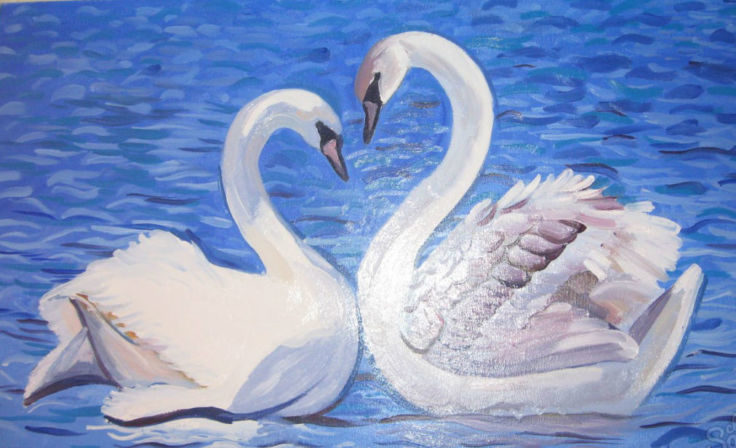
Impressive graceful swans associated with fidelity and love. The simplest version begins by drawing the number two, flowing into the torso, swaying on the waves. These birds have a characteristic mark on a wide beak and webbed feet.
Fairy Variations
The firebird from the fairy tale is the owner of sweeping wings-fans and a falling train-tail, a non-trivial fiery coloring, performed at its own discretion.
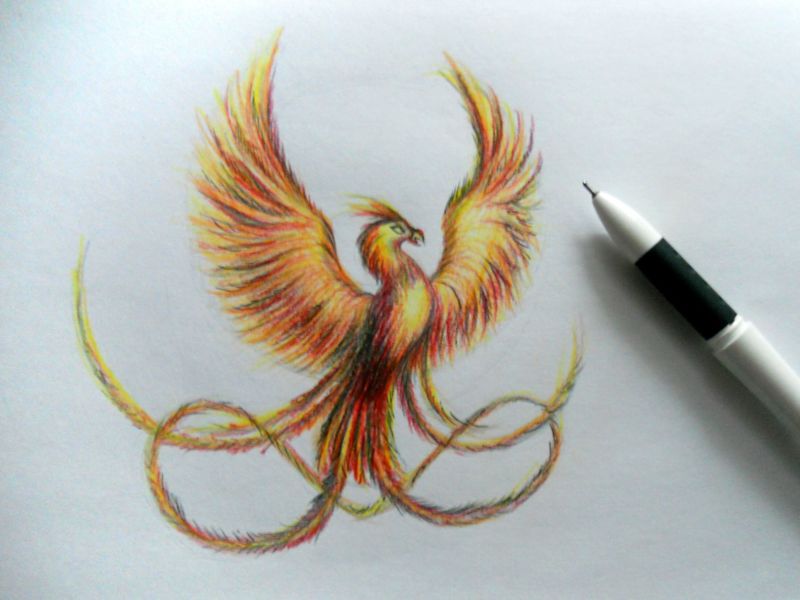
It is filled with patterns-figures of different colors, from which strokes diverge, comparable to hair. Next, you need to blacken the edges of the plumage and fix the head crest.
Also interesting is the character, who has an extraordinary bright appearance. This is a circle with a polygonal beak, on the sides of which huge eyes are placed with obligatory bags under them. There is a crest on the head, and a miniature ponytail on the left. You can start coloring.
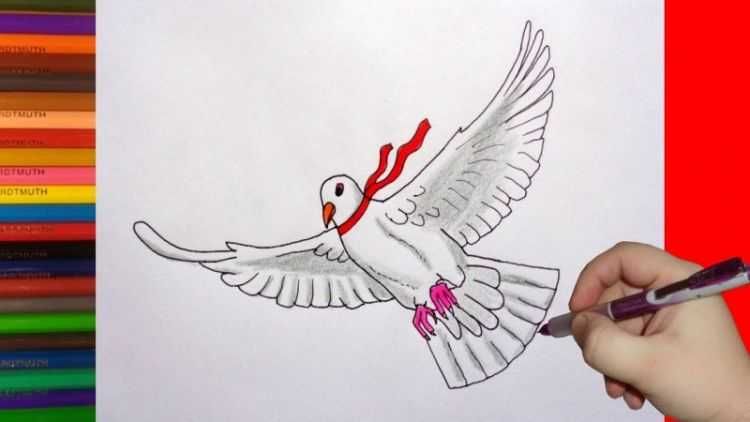
Dove of peace
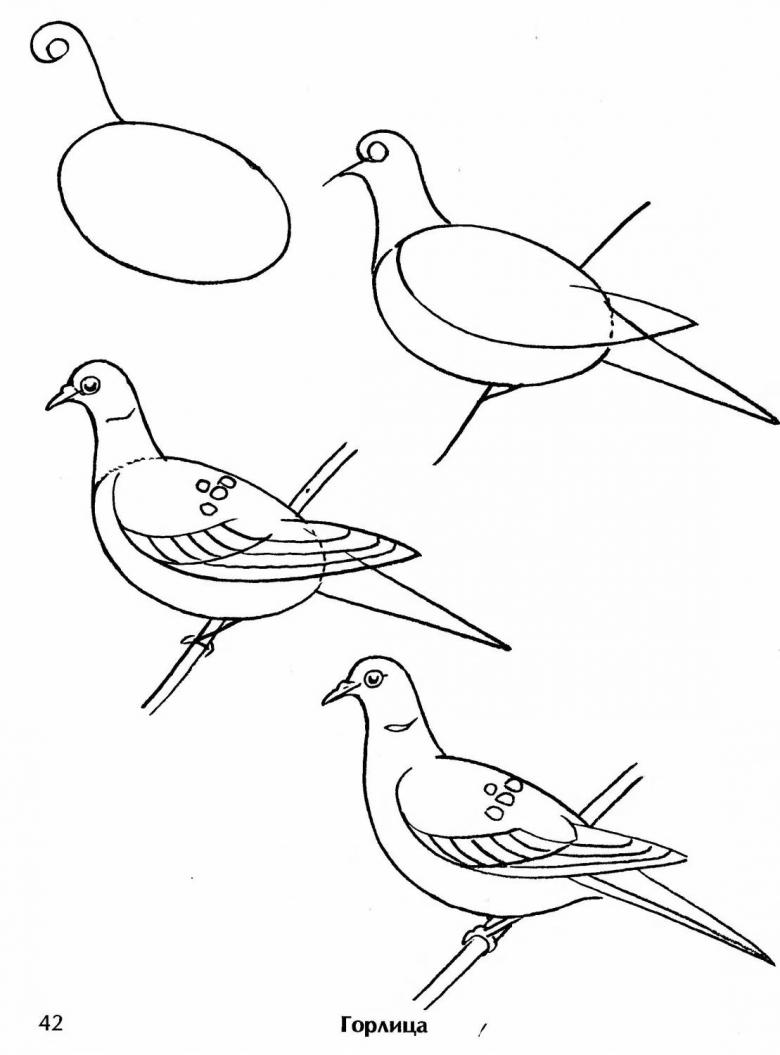
When thinking about how to draw a bird for children, remember the dove – a fluttering creature with a flowering twig in its beak, which is a symbol of peaceful life.
Having circled the body-oval and the head-circle, they are combined by adding a carved tail. Wings wide open to the sides can be compared in shape with an inverted trapezoid. The final stroke is to give the edges of the feathers fragmentation in zigzags.
Of course, it is impossible to cover all the inhabitants of heaven. Starting with one image and consolidating skills, move on to the next sample. Kids will certainly enjoy this exciting pastime, which not only develops fine motor skills of the hands, but also expands their horizons and knowledge about the terrestrial fauna.
How to draw a bird with a pencil and paints – detailed and step-by-step master classes for children and beginner artists
Representatives of the bird world are found in nature in an amazing variety, they symbolize the sky, freedom, life and abundance. Sketches of birds often appear in children's albums.
Drawing birds is not only exciting, but also informative, because children get acquainted with forest, domestic and exotic individuals.
Parents should tell the child about their value for the natural environment, the features of the anatomical structure and differences, sometimes even watching the winged singers from the window and feeding them in the winter.
How to draw a bird
The process of drawing birds will be greatly simplified if you follow the recommendations and train regularly, stuffing your hand. Master classes will be useful for children of all ages, helping to cope with a difficult task, while mastering artistic skills.
Let's try to recreate this expressive image step by step:
- The work begins with two circles with cross-shaped lines at the smaller upper figure.
- We outline them with smooth lines, continuing the back, ending in a tail.
- Draw the legs with three fingers.
- We depict round eyes with eyebrows and characteristic ears.
- Below we have a beak that looks like a hook.
Now you need to display the plumage, lying in rows on the wing, tail, and fluff on the chest, transmitted by hatching. The pencil drawing of the bird is ready.
Penguin
Not flying, but floating, recognizable from cartoons and movies, the specimen also belongs to the feathered family, its appearance is easy to reproduce in profile. You will need to outline a vertical egg, ending with a small head with a beak. We draw a short tail and legs.
The most important thing is to correctly paint over the picture with paints or felt-tip pens – the head region, the back with wings-fins of black color, and the abdomen – white.
chick
The proposed version of the image of the chick is simple. We lead an arc from bottom to top, ending with an arrow-nose. Next we apply an eyeball with a pupil. From the arrow we continue the bow to the starting point, ending with a tail. We paint on an arched wing and thin legs.
Parrot
Many keep these bright individuals at home, we will draw a catchy bird in stages:
- We throw a scheme of 2 ovals, on the left we draw a trace line that turns into a flowing tail.
- The floor with a rounded ruler we denote the bottom of the wing.
- We draw a crush, skeleton eyes and paws.
We proceed to contrasting, conveying the feeling of feathers. We use red, blue, yellow. Black tonality select the base of the beak and edge of the feather.
If you want to capture the parrot in flight, a pair of arched lines show the outstretched wings with an arcuate lower edge, his face will be in the semi-turn, supplementing the eye-butter and nose with a hump.
Woodpecker
A cautious and beautiful pichug with a knock on the wood trunk not only gets food for itself, but also gives it to the other “relatives” about the boundaries of their territory, attracting females in the spring. Procedure:
- We draw the head-out and the body with the exiting wings.
- We draw a line of beak, paws and go to the hanging tail.
- Detail the wing, circling the contours and highlighting the strokes.
- We remove unnecessary dashes and give clarification to the eye.
Reding will add realism – a red head, white chest. Black coloring we emphasize the beak and other fragments of the body.
This handsome man has long legs, an egg -shaped case and a small head with an elongated yellow nose. Having completed the sketch, we clarify the details. We draw the raised wings in a row.
Golenty yellowish limbs have a thickening in the middle. The air inhabitant has a snow-white color with a gray-blue tint at the tips of the plumage. Sticks emphasize the fluff in the chest area.
If you took up the heron, then give her neck a larger bend, and draw a crest on the back of the head, let her keep her balance on one limbs, tightening the second, so it is more familiar to act when hunting river animals.
Bullfinch
We portray a small bird with a colorful look that does not fly to wintering in hot countries:
- We draw an oval body and a head-round.
- We lead a line passing into the wing.
- We fix the neck and tail segment.
- The paws will hold tenaciously by the branch.
We color the figure-a bright red breast, a white spot under the eye resembling a bead with a dot, a darkened plumage.
A flying seagull
At first, the task seems difficult, however, it is in the power and child:
- The head is outlined and an elongated body with a lower bulge.
- The near wing has a more elongated format compared to the distant element.
- The continuation of the figure will be the tail.
- Bird legs are folded and pressed.
- We display more precisely features-sounds.
With a hatch, we show the fall of the shadow. It is worth noting that the dimensions of flying wings increase directly in proportion to the size of the case.
Small rocks
Sparrows are the most common family, their oval body is equipped with a tidy head and a slying triangle. Draw a wing, eye and thin legs.An interesting titmouse with a rounded yellow belly.
The smallest pichuga is a hummingbird, distinguished by a long nose, thickened at the base, with which she drinks nectar from flower buds, she also earned fame for her ability to fly backwards. The picture will turn out to be plausible if you carefully work out the feathers of the birds.
Crow
Crow flocks have chosen places close to humans, these birds are quick-witted and smart. We offer a way to draw this bird easily and simply:
- On one diagonal we draw contour sketches of the head and torso, thickened towards the bottom and a triangular tail.
- We connect these details with a stroke, drawing a beak and two paws with claws.
- We detail the wing and give the tail section a flat look.
- Having removed the basting, we proceed to the plumage.
- We designate a highlight inside the eye, from it there is an additional curve to the beak.
You can start hatching with a black pencil, emphasizing the feather coating with contrast. If you chose the image of a magpie, then remember its peculiar black and white color and long tail.
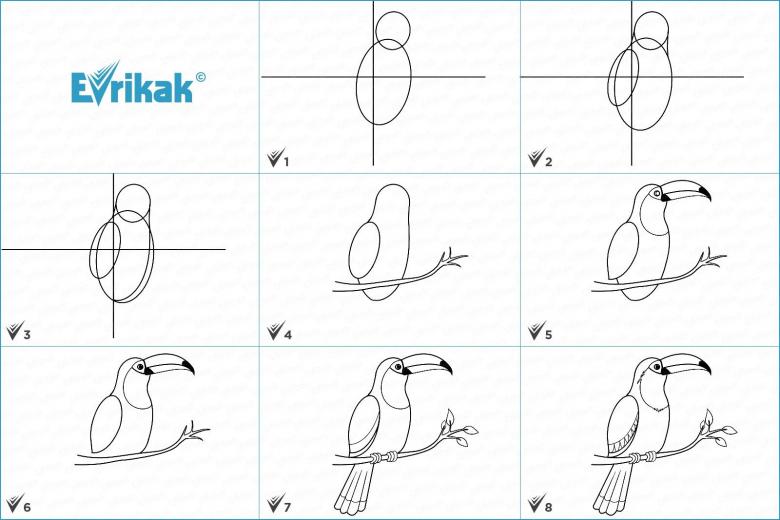
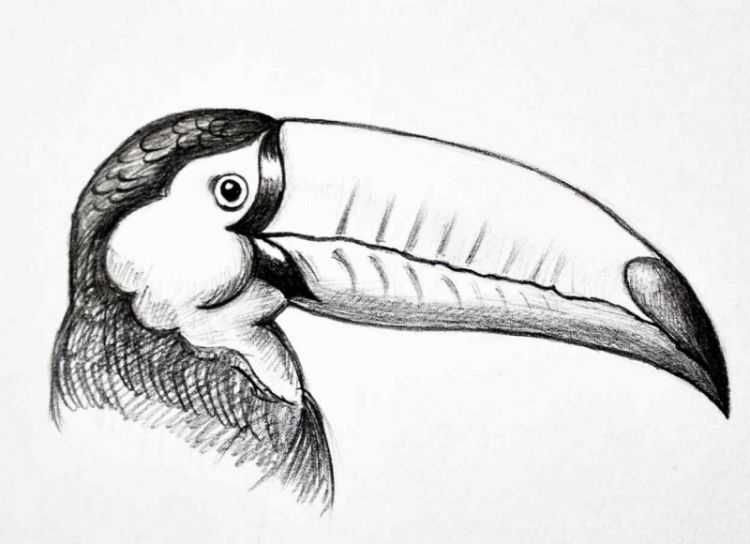
Unusual specimens
There are varieties that cannot be confused with anyone. For example, this is a heavy pelican, with a bag-beak, where he keeps fish or a toucan with a special structure of a voluminous nose-beak.
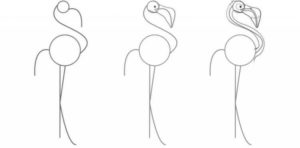
Graceful and spectacular are pink flamingos on elongated legs, and the nimble swallow is distinguished by a forked tail and erected nests-huts.
The highlight of the peacock is a chic blooming fan-tail with diamond-shaped color patterns, and its head is crowned with a “crown” of corollas with circles.
Let's depict a formidable eagle:
- We make a general sketch of the body with all its fragments.
- We start detailing from the head with a slightly open beak-hook and an eye with a pupil under the eyebrow.
- We approach the back, dropping to the tail.
- The sitter has sharp claws on large paws, and specific “panties” on the shins.
- We convey plumage on powerful wings with hatching.
We paint on the stump on which the predator sits.
Impressive graceful swans associated with fidelity and love. The simplest version begins by drawing the number two, flowing into the torso, swaying on the waves. These birds have a characteristic mark on a wide beak and webbed feet.
Fairy Variations
The firebird from the fairy tale is the owner of sweeping wings-fans and a falling train-tail, a non-trivial fiery coloring, performed at its own discretion.
It is filled with patterns-figures of different colors, from which strokes diverge, comparable to hair. Next, you need to blacken the edges of the plumage and fix the head crest.
Also interesting is the character, who has an extraordinary bright appearance. This is a circle with a polygonal beak, on the sides of which huge eyes are placed with obligatory bags under them. There is a crest on the head, and a miniature ponytail on the left. You can start coloring.
Dove of peace
Thinking about how to draw a bird for children, remember the pigeon – a fluttering creature with a flowering twig in a beak, which is a symbol of peaceful life.
Having circled Taurus and the head and head, they are united, drawing a carved tail. Wings open to the sides can be compared in shape with an inverted trapezoid. The final smear – giving the edges of the fathers of fragmentation of zigzags.
Of course, it is impossible to cover all the inhabitants of heaven. Starting with one image and fixing the skills, go to the next sample. The kids will certainly like this exciting pastime, not only developing fine motor skills of hands, but also expanding their horizons and knowledge about the earth's fauna.